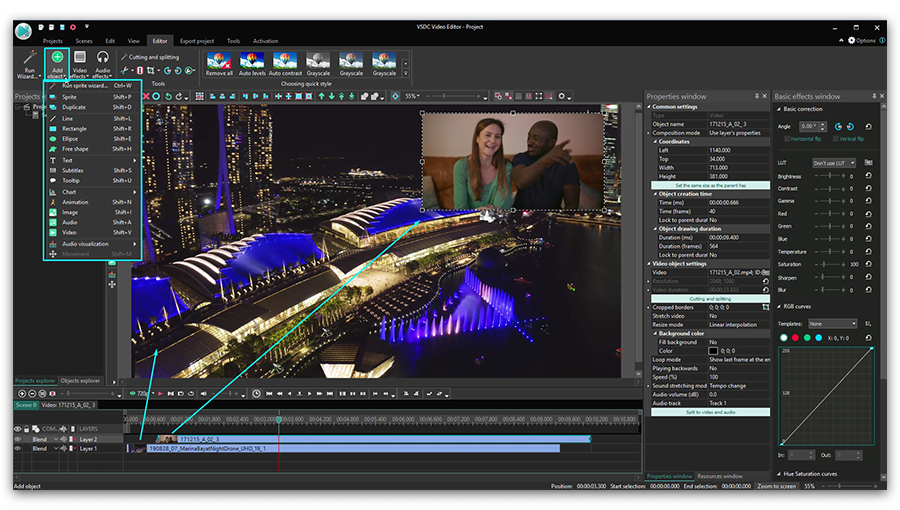
Video Düzenleyici

Aile tebrik kartından şirket sunumuna kadar her türlü karmaşıklıkta videolar oluşturmak ve düzenlemek için ücretsiz video yazılımını kullanın. Video dosyalarını kesin, birleştirin, görsel ve ses efektleri uygulayın, filtreleme ve görüntü düzeltme kullanın, slayt gösterileri yapın ve uygun bir film müziği ekleyin. Videonuza profesyonel bir görünüm kazandırmak için çok renkli Renk anahtarı ve gelişmiş parametre ayarlarını kullanın. Tüm popüler video ve ses formatları desteklenir.

Video Düzenleyici hakkında daha fazla bilgi edinin...

Video Dönüştürücü

Bu program video dosyalarını bir biçimden diğerine dönüştürmek için tasarlanmıştır. Hemen hemen tüm popüler video biçimleri (hem okuma hem de kaydetme) desteklenir. Ayrıca iPhone, Huawei P30 Pro veya Samsung Galaxy gibi belirli multimedya cihazları için videolar oluşturmak da mümkündür. Programın kullanımı son derece kolaydır, modern bir arayüze ve gerekli tüm video işleme fonksiyonlarına sahiptir.

Video Dönüştürücü hakkında daha fazla bilgi edinin...

Ses Dönüştürücü

Bir ses dönüştürücü kullanarak ses dosyalarını bir biçimden diğerine dönüştürebilirsiniz. Tüm önemli ses biçimleri ve codec bileşenleri desteklenir. Program ayrıca çalma listelerini ve meta etiketlerini yönetmenize izin verir, ayrıca video dosyalarından sesi dışa aktarmak ve parçaları herhangi bir biçimde bilgisayarınıza kaydetmeniz de mümkündür.

Ses Dönüştürücü hakkında daha fazla bilgi edinin...

Ses CD’si Yakalayıcı

Bu ses aracı kompakt disklerden ses parçalarını kopyalamaz ve bunları seçtiğiniz herhangi bir biçimde bilgisayarınıza kaydetmek için tasarlanmıştır. Neredeyse tüm popüler ses biçimleri ve codec bileşenleri desteklenir. Program ayrıca dosyaları otomatik olarak yeniden adlandırma ve meta etiketleri güncelleme için parça ayrıntılarını FreeDB sunucusundan ayıklayabilir.

Ses CD’si Yakalayıcı hakkında daha fazla bilgi edinin...

Çok işlevsellik

Çok işlevsellik

Tek bir ücretsiz video yazılım paketinde çok çeşitli multimedya işleme araçları

Yüksek hız

Yüksek hız

Programlar hızlı, optimize edilmiş çok işlemcili algoritmalar kullanır.

Kullanılabilirlik

Kullanılabilirlik

VSDC video yazılımı, Windows işletim sistemi tabanlı tüm bilgisayarlarda ve cihazlarda ücretsiz olarak indirilebilir.

VSDC’de sinemagraf oluşturma hakkında bilmeniz gereken her şey

Videolar ve görüntüler dijital çağda görsel sanatın temelini oluşturmaktadır ve bu özellikle son birkaç yılda içerik üreticileri arasında oldukça popüler bir hale gelmiştir. Sinemagraf videonun dinamizmini ve statik görüntülerin odağını birleştirerek etkileyici görünür. Bu eğitimde VSDC Ücretsiz Video Düzenleyici’yi kullanarak bilgisayarınızda sinemagrafların nasıl oluşturulacağını ayrıntılı olarak açıklayacağız.

How to make a cinemagraph - tutorial from VSDC

İlk önce bilgisayarınıza doğru yazılımı yükleyin

Sinemagrafın temeli statik görüntülerden oluştuğu için birçok kişi Photoshop veya başka bir fotoğraf düzenleme yazılımıyla çalışmanın gerekli olduğunu düşünür. Ancak Adobe Photoshop’ta deneyiminiz yoksa programı anlamanız biraz zamanınızı alacaktır. Üstelik sadece sinemagraf oluşturma görevi için bu her zaman rasyonel de olmayabilir. Bunun için biz tam tersi bir yaklaşım öneriyoruz ve aşağıda açıklayacağımız üç nedenden dolayı VSDC Video Düzenleyici’yi indirmenizi şiddetle tavsiye ediyoruz:

  • VSDC videolarla ile çalışmak üzere tasarlanmıştır ve görüntü düzenleyicilerin aksine sinemagraf oluşturmak için ihtiyacınız olan tüm araçları içerir;
  • Bu program tamamen ücretsiz bir sürümde mevcuttur;
  • VSDC’de sinemagraflar oluşturmak için herhangi bir kurulum deneyimine veya özel bir uzmanlığa ihtiyacınız yoktur.

Sinemagraf nasıl yapılır? Yöntem 1

VSDC ile bir sinemagraf oluşturmanın iki yolu vardır. Önce ücretsiz seçenekle başlayalım.

Yöntem 1 ile ilgili bir video eğitimi burada mevcuttur:

  1. Bilgisayarınızda VSDC'yi başlatın.
  2. Ana menüden “İçeriği içe aktar” seçeneğini seçin.
  3. Sinemagraf için kullanmayı tasarladığınız videoyu seçin ve “Bitir”e tıklayın. Video zaman çizelgesine otomatik olarak eklenecektir.
  4. Videoda "dondurmak" ve statik bir arka plan olarak kullanmak istediğiniz anı seçmek için zaman çizelgesine farenin sol tuşuyla tıklayın.
  5. Üst menüdeki “Kesme ve bölme” sekmesine gidin ve İngiliz anahtarı simgesine tıklayın.
  6. Açılır menüde “Anlık görüntü oluştur” seçeneğini seçin. Görüntü sağdaki Kaynaklar penceresine eklenecektir (“Görüntüler” bölümü).
  7. Zaman çizelgesine dönün ve imleci videonun en başına getirin. Böylece sonraki tüm nesneler otomatik olarak klibin başına eklenecektir.
  8. VSDC Free Video Editor timeline close-up

  9. Şimdi anlık görüntüyü ön izleme alanına sürükleyin. Zaman çizelgesine otomatik olarak eklenecektir.
  10. Sol taraftaki menüden yeşil renkli “Serbest şekil ekle” seçeneğini seçin ve Tamam’a tıklayarak şekli sahneye ekleyin.
  11. Sol fare düğmesini basılı tutup imleci düzenleyicinin ön izleme alanı üzerinde hareket ettirin ve şekli oluşturun.
  12. Zaman çizelgesindeki “Serbest Şekil” katmanına çift tıklayın.
  13. Tüm Şekil noktalarını silin.
  14. Üst menüye ilerleyin, “Serbest şekil” sekmesini seçin ve “Nokta yerleştir” seçeneğine tıklayın.
  15. Sinemagrafınızda "canlandırmak" istediğiniz alanı seçmek için farenin sol tuşunu kullanın.
  16. Zaman çizelgesinin sol tarafındaki "Sahne 0" sekmesine dönün.
  17. Ekranın sağ alt köşesindeki “Özellikler” sekmesine gidin ve serbest şekliniz için siyah rengi seçin. “Kalem” bölümünün altındaki değil, “Fırça” bölümünün altındaki rengi seçtiğinizden emin olun.

    Free shape settings window in VSDC

  18. Video katmanına sağ tıklayın ve "Kes"i seçin.
  19. Zaman çizelgesindeki “Serbest Şekil” katmanına çift tıklayın.
  20. Üst menüye gidin, “Video Efektleri --> Saydamlık --> Kırpma” öğesini seçin.
  21. “Kırpma” maskesi katmanı, otomatik olarak zaman çizelgesine eklenecektir, üzerine çift tıklayın.
  22. Ön izleme alanına sağ tıklayın ve Yapıştır’ı seçin. Bu şekilde videoyu kırpma maskesi alanına eklediniz.
  23. Her şeyin istediğiniz gibi göründüğünden emin olmak için zaman çizelgesinin üzerindeki “Ön izleme” düğmesini kullanın.
  24. Üst menüdeki “Projeyi dışa aktar” sekmesine geçin. Bilgisayarınızda sinemagrafı yerleştirmek istediğiniz biçimi ve konumu seçin.
  25. Kırmızı renkli “Projeyi dışa aktar” butonuna tıklayarak işlemi tamamlayın.

Temel olarak bu yöntemle içinde video bulunan serbest bir şekli statik bir görüntünün üzerine yerleştirirsiniz.

Creating a cinemagraph using a free shape object

Sinemagraf nasıl yapılır? Yöntem 2

Yöntem 2’de maske aracını kullanacağız. Bu sinemagraf oluşturmanın kullanışlı bir yoludur, ancak Pro sürümünü satın almanızı gerektirir. Yöntem 2 ile ilgili bir video eğitimi aşağıda mevcuttur:

  1. Yöntem 1’deki ilk 6 adımı tekrarlayın.
  2. Ön izleme alanına sol tıklayın. Bu şekilde zaman çizelgesindeki video katmanının seçimini kaldıracak ve yeni nesneleri ön katmana ekleyeceksiniz.
  3. Anlık görüntüyü Kaynaklar penceresinden ön izleme alanına sürükleyin. Otomatik olarak zaman çizelgesinin başlangıcına eklenecektir.
  4. Yeni "Görüntü" katmanına çift tıklayın.
  5. Sol taraftaki menüden yeşil renkli “Elips ekle” seçeneğini seçin ve Tamam’a basın. Dikdörtgen seçeneğini de amaçlarınız için kullanabilirsiniz.
  6. Sol fare düğmesine basılı tutup fareyi ön izleme alanı üzerine sürükleyerek Elips ekleyin.
  7. Elipsi sinemagrafınızda “canlandırmak” istediğiniz alanı tam olarak kaplayacak şekilde yerleştirin.
  8. Ekranın sağ alt köşesindeki “Özellikler” sekmesine gidin ve Elips için siyah rengi seçin. “Kalem” bölümünün altındaki değil, “Fırça” bölümünün altındaki rengi seçtiğinizden emin olun.
  9. Zaman çizelgesinin sol tarafında "Karıştırma modu" menüsünü bulun ve "Maske" seçeneğini seçin.
  10. Her şeyin istediğiniz gibi göründüğünden emin olmak için zaman çizelgesinin üzerindeki “Ön izleme” düğmesini kullanın.
  11. Üst menüdeki “Projeyi dışa aktar” sekmesine geçin. Bilgisayarınızda sinemagrafı yerleştirmek istediğiniz biçimi ve konumu seçin.
  12. Kırmızı renkli “Projeyi dışa aktar” butonuna tıklayarak işlemi tamamlayın.

Teknik açıdan bakıldığında bu yöntemle videonun üst kısmında bulunan statik görüntüde istenilen şekilde bir delik açılır.

Creating a cinemagraph using masking feature

Yukarıda açıklanan iki yöntem arasındaki temel farklar aşağıdaki tabloda özetlenmiştir.


Yöntem 1 (ücretsiz sürüm)

Yöntem 2 (Pro sürüm)

Sahnede kaç katman var?

İki: Serbest şekil ve Görüntü (ekran görüntüsü)

İki: Video ve Görüntü (ekran görüntüsü)

Arka plan katmanında ne var?

Görüntü (ekran görüntüsü)

Video

Hangi katman düzenlenir?

Serbest şekil ve Kırpma maskeli katman

Görüntülü Katman

Hangi efekt uygulanır?

İçinde Serbest şekilli bir video bulunan bir Kırpma maskesi ekleme

Görüntü katmanına maske kullanarak bir elips veya dikdörtgen ekleme


İşte bu kadar. Sizin için en uygun yöntemi seçin ve düzenlemenin tadını çıkarın!


Program hakkında daha fazla bilgiyi Ücretsiz Video Düzenleyici’nin açıklama sayfasından edinebilirsiniz.

VSDC'de 4K video nasıl düzenlenir? İpuçları ve püf noktaları

Aksiyon kameraları bu kadar yaygın değilken 4K çözünürlükte çekim yapmak profesyonel video düzenleyicilerinin bir ayrıcalığıydı, ancak o zamanlar artık geride kaldı. Günümüzde bir akıllı telefonda bile bu kadar yüksek kalitede videolar kaydedebilirsiniz ve YouTube gibi video paylaşım platformları, kullanıcılarına bu yeni teknolojiyi her geçen gün daha fazla amatörle tanıştıran 4K klipler yükleme olanağı sunmaktadır.

İnternetteki sayısız makaleye göre 4K ile çalışmak pahalı bir hobidir ve bir kameranın maliyeti diğer yapacağınız harcamaların yanında en düşük bütçeli olanıdır; bir bilgisayarı yükseltmek ve yazılım satın almak için en az 2500 dolar ayırmak gerektiğini, aksi takdirde Ultra HD video düzenlemenin size göre olmadığını söylerler. Neyse ki İnternetteki bilgiler her zaman doğru değildir ve 4K videoları düzenlemenin çok daha uygun fiyatlı yolları vardır. Örneğin ortalama bilgisayarlarda bile yüksek kaliteli videoları işleyebilen bir yazılım bulabilirsiniz. Bu yazılım VSDC Ücretsiz Video Düzenleyici’dir. VSDC, nispeten düşük sistem gereksinimleri ve sınırlı belleğe sahip bilgisayarlarda bile 4K görüntüleri işleyebilme özelliği ile bilinir.

Aşağıda VSDC'ye nasıl başlayacağınızı göstereceğiz ve 4K videoları düzenlemek için size bazı ipuçları vereceğiz.

Videoyu içe aktarma

Kurulum işlemini tamamladıktan sonra VSDC'yi başlatın ve üst menüden "İçeriği İçe Aktar" düğmesini tıklayın. Bilgisayarınızda istediğiniz 4K videoyu seçin. Bu şekilde video kalite kaybı olmadan programa aktarılacak ve sahne ayarları Ultra HD video parametrelerinize göre ayarlanacaktır.

Renk düzeltmesi

Düzenlemeye geçelim. 4K çözünürlük aslında ultra gerçekçi videolar oluşturmanıza olanak tanıyan bir büyüteç gibi çalışır. Sahnenin ve konunun tüm ayrıntılarını hem olumlu hem de olumsuz olarak vurguladığı gerçeğine hazırlıklı olmalısınız.

How to edit 4K video: color correction features in VSDC

Örneğin bu tür videolar hem zayıf ışığı hem de kasvetli havayı tam olarak yansıtır. Bu nedenle düzenleme sürecinde genellikle renk düzeltmeye başvurmanız gerekir. VSDC'de renk spektrumunu geliştirmek için sol üst köşeye gidin ve Video Efektleri >> Ayarlamalar öğesini seçin. Klibinizin karşıtlığını, gamasını ve diğer görsel özelliklerini geliştirmek için mevcut seçenekler arasından seçim yapın.

Videoyu dışa aktarma

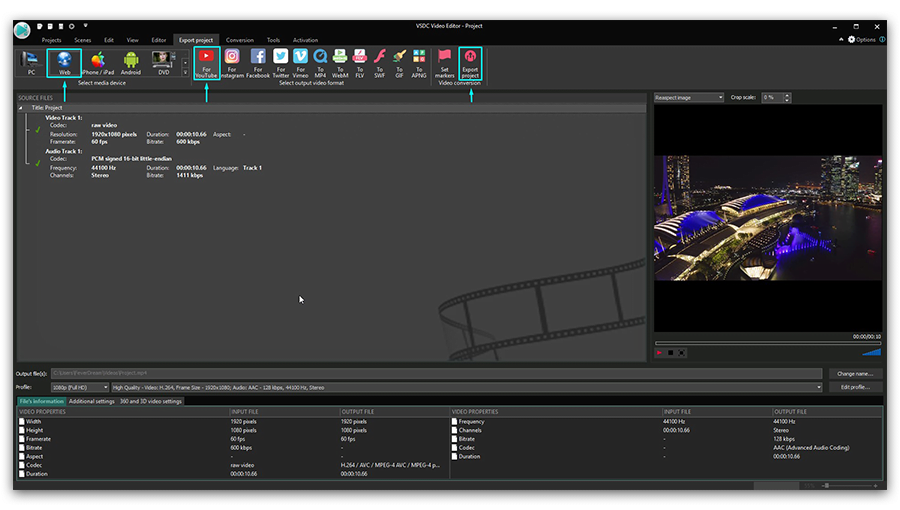
Düzenlemeyi bitirdiğinizde videonuzu Full HD olarak dışa aktarın. Bunu yapmak için üst menüye gidin ve “Projeyi Dışa Aktar >> Web >> YouTube için” öğesini seçin. Dosya adını ve bilgisayarınızda onu kaydetmek istediğiniz konumu “Çıktı dosyaları” alanında belirtin. “Projeyi Dışa Aktar” sekmesine tıklayarak işlemi bitirin. Dönüşüm, donanımınızın kapasitesine bağlı olarak biraz zaman alabilir.

4K videonuzu dışa aktarma konusunda hâlâ sorularınız varsa lütfen aşağıdaki kısa video eğitimine göz atın.

4K videoların boyutunu küçültmek mi istiyorsunuz?

Ortaya çıkan dosya çalışmak için çok büyükse veya depolama cihazınızda yeteri kadar alan yoksa VSDC’yi kullanarak klibinizin boyutunu her zaman küçültebilirsiniz. Bunu yapmak için videoyu içe aktarın, “Projeyi Dışa Aktar” sekmesini seçin ve “Profili Düzenle” bölümüne gidin. Gerekli çözünürlüğü seçmek için “Profil Filtresi” seçeneğini bulun. 1080 (Full HD) veya 720 (HD) çözünürlükleri önemli kalite kaybı olmadan bir klibi kaydetmek için oldukça uygundur. Değişiklikleri kaydetmek ve projenizi üst menüden dışa aktarmaya devam etmek için “Profili Uygula”ya basın.

Ek 4K Video Düzenleyici Özellikleri

VSDC'yi 4K video düzenleyiciniz olarak sık sık kullanmayı planlıyorsanız işlem hızını artırmak isteyebilirsiniz. Bu, VSDC'nin Pro sürümünde bulunan donanım hızlandırma özelliği sayesinde elde edilebilir. Pro sürümü, 4K video dışa aktarmayı hızlandırarak video kartınızın kapasitesinden (video kartı destekliyorsa) yararlanır.

Pro sürümünü satın aldıysanız program seçeneklerinde donanım hızlandırmayı etkinleştirdiğinizden emin olun. Ayrıca belirtmek isteriz ki donanım hızlandırma, VSDC'nin Pro sürümüyle elde ettiğiniz tek bonus değildir.

Örneğin bir aksiyon kamerasıyla video çekiyorsanız kesinlikle bir video sabitleme aracına ihtiyacınız olacaktır. Burada nasıl kullanılacağına dair ayrıntılı talimatları bulabilirsiniz. Görsel kılavuzları tercih ediyorsanız size kolaylık sağlamak için hazırladığımız video talimatını da seyredebilirsiniz.

Kullanışlı olabilecek başka bir özellik de kalite kaybı olmadan videonun yeniden boyutlandırılmasıdır. Mesele şu ki bir 4K videoyu düzenleyiciye aktardığınızda ve boyutunu manuel olarak küçülttüğünüzde (örneğin sahnenin yalnızca bir kısmını kaplayacak şekilde) genellikle bir kalite kaybı yaşanır. VSDC'nin Pro sürümü, bunu engellemenize ve videoyu en iyi çözünürlükte işlemenize olanak tanır. Yeniden boyutlandırma ve Pro sürümün diğer özellikleri hakkında daha fazla bilgi edinmek isterseniz ayrıntılı kılavuzumuza göz atın.

Şimdilik bu kadar. 4K video düzenleme deneyiminizin tadını çıkarın!


Program hakkında daha fazla bilgiyi Ücretsiz Video Düzenleyici’nin açıklama sayfasından edinebilirsiniz.

VSDC – Free MP4 Video Editor for Windows Reviewed

How to edit MP4 video for free on a Windows PC

MP4 is probably the most common video format because the majority of recording devices including cameras, smartphones, and drones produce MP4 files. It’s also the most widely recognizable format that can be opened by iOS and Android phones, most TVs, gaming devices, and DVD players.

Naturally, many people are either looking for a way to quickly edit MP4 videos or to convert their videos into MP4 and edit them afterward. If you’re one of them, this tutorial is for you.

Meet VSDC, a free MP4 video editor for Windows with no watermarks or quality restrictions. VSDC is your best bet because it’s a one-stop shop for working with multimedia files. You can use it when you need a powerful converter, a full-featured MP4 video editor, or when you just need a quick MP4 video splitter to break down your footage into multiple fragments.

Download the latest version of VSDC

We’ve compiled this tutorial, based on the most common tasks involving MP4 video editing. Keep reading it to learn:

  • How to edit MP4 videos using VSDC
  • How to split MP4 videos into parts
  • How to add music to an MP4 video
  • How to remove audio from MP4
  • How to slow down or speed up MP4 videos
  • How to reverse an MP4 video
  • How to create a GIF from MP4 (or convert it to any other format after editing)
  • How to make MP4 video file - instruction for export project from video editor to mp4 file

Here is exactly what you get when you install VSDC Free Video Editor to your PC

Before we jump to a more detailed review of how to edit MP4 videos in VSDC, here is what you’re getting when you install this video editor to your PC.

First of all, this software is very lightweight and requires minimum resources of your PC. That means you can safely use it even if you have a slightly outdated computer with not-so-much memory left. To be precise, you’ll only need 256Mb of RAM and 50Mb of free disk space.

Downloading VSDC may take a few minutes depending on your Internet connection, and when you launch the program, here is what the start screen looks like.

VSDC - free MP4 video editor start screen overview

VSDC has a PRO version you’ll be offered to upgrade to after installation. At this point, you can simply close the promotional banner (or click “Continue” if it pops up at the export stage) if you aren’t ready to upgrade.

The suite includes multiple tools, and it’s not just an MP4 video editor. There is also a video grabber, an instrument for capturing desktop screen, a slideshow creator, a video converter, a voice recorder, and a YouTube uploader.

To start working, click on the large “Import content” button and choose a video file from your PC. A “Project settings” window will pop up, and unless you want to change any parameters – resolution, framerate, size of the video – just click “Finish”.

How to edit MP4 videos on Windows

Now that you have a file uploaded to VSDC, take a look at the key menu sections you’ll need for editing it.

VSDC Free Video Editor interface

Once imported, the file is automatically placed on the timeline – your main working area. You’ll be using the green cursor for splitting videos precisely and the red Preview button for checking the results of your actions. If your PC processor struggles with the file size, the video may look choppy during the preview. It doesn’t affect the output file in any way, however, for your convenience we recommend decreasing preview quality using the dropdown menu to the left from the Preview button.

Now, the top ribbon menu contains all the basic tools you’ll need for your project. Add new audio, video, or image files using the green round button and refer to the Cutting and Splitting menu for – you guessed it – cutting and splitting. The latter is also your go-to tab if you need to crop or rotate an MP4 video. Some other tasks, such as playback speed or audio adjustments, are performed in the Properties window – a sticky tab on the right. We’ll get to it in a couple of paragraphs. And finally, the Export project tab is where you get to save the file to your PC after editing.

Now that you have a better understanding of VSDC interface, let’s proceed with some basic tasks this MP4 video editor will help you with.

How to use VSDC as an MP4 video splitter

Splitting an MP4 video is no different from splitting any other video file:

  • Place the cursor at the exact moment you want to split the video into parts.
  • Hit the icon looking like a razor from the Splitting and Cutting menu at the top.
  • Click anywhere on the timeline to cancel the selection of the entire video, then select the fragment you need and hit Delete or drag it across the timeline – depending on your final goal.

Free MP4 video splicer

How to add music to an MP4 video/How to remove audio from MP4

To add music to an MP4 file, simply hit the green Add object button and choose a soundtrack from your PC. The audio file will be placed on the timeline, and you’ll be able to split and drag it just like you would do with a video file. To adjust the volume, you’ll need to select the audio file and go to the bottom of the Properties window menu where the Audio volume parameter is available.

Sometimes you may need to do the opposite: extract or remove audio from the MP4 file. Here is how to do it:

  1. Click on the video file or a fragment you’re working with to select it on the timeline.
  2. Go to the Properties window and scroll down to the very bottom.

    How to add or remove music from an MP4 video file

  3. If you choose “Split to video and audio”, you’ll get the sound of your video as a separate track on the timeline (see the illustration, the audio track is placed above the video on the timeline). Splitting is a good idea when you need to apply audio effects, adjust the volume, cut out an audio fragment – in other words, work with the existing audio more precisely.
  4. If you need to remove audio from your video completely, you can either delete the audio track you’ve just got by splitting the file OR you can choose “Don’t use audio” in the Audio track menu section highlighted in the illustration above.

How to slow down or speed up MP4 videos/ How to reverse an MP4 video

To slow down an MP4 video, you need to reduce the playback speed of your file. This is a very easy task:

  1. Select the fragment of the video you want to slow down.
  2. Go to the Properties window and scroll down to the Speed% menu section.
  3. Change the speed according to your needs. For instance, setting the speed at 50% will make your video twice slower.

Slowing down and speeding up an MP4 video

If you need to speed up an MP4 file, use the same settings to increase the speed % to the desired level. We have a separate detailed tutorial on how to speed up a video and achieve a fast-motion effect, if you’d like to learn more.

Finally, if you’re trying to find out how to reverse an MP4 video, switch from “No” to “Yes” in the dropdown “Play backward” menu above the Speed% parameter as illustrated above.

Remember that when you change the video playback speed, its audio adapts automatically. Therefore, you might want to mute it or replace it with a more appropriate soundtrack.

How to create a GIF from MP4 (or convert it to any other format after editing)

If you just need to convert an MP4 video file to any other format, we recommend using a free video converter. But if you want to create a GIF from MP4 after editing, just select the corresponding format at the export stage as illustrated below.

Converting an MP4 video file to a GIF or any other format in VSDC

As you can see, there is a large number of other formats you can choose based on your goals. Besides, VSDC allows you to save videos using social media profiles. That means if you’re planning to publish your clip to Facebook, Twitter, Instagram, YouTube, or Vimeo, the program will apply the parameters required by these social media platforms to your file automatically. And if you need to adjust video quality, you can do so using the “Edit profile” button in the lower right corner of the Export screen.

Then use the preview window for a final look and hit the Export project button when ready.

Final thoughts on VSDC as a free MP4 video editor

MP4 is an industry standard supported by most devices and multimedia software. One of its key benefits is high image quality preserved due to the H.264 codec. So, when you need to edit an MP4 video file, you should take this factor into consideration because some free video editors put severe limitations on the file formats and resolution at the export level.

When it comes to VSDC, not only does it allow you to keep the highest quality of the video, it also supports H.265/HEVC – the successor of H.264 codec. That means even if your video is in 4K, you’ll be able to keep its preciseness after editing.

If you’d like to learn more on what VSDC Free Video Editor is capable of, check out its YouTube channel.

VSDC Ücretsiz Video Düzenleyici ile Bir Videoyu Tersine Çevirme

Videoyu geri sarma efekti hem yeni başlayanlar hem de deneyimli vlogger`lar arasında oldukça popülerdir. İnternette bu efekti uygulamanıza izin veren birçok çevrimiçi uygulama olmasına rağmen ancak bunların birtakım önemli dezavantajları vardır. İlk olarak uygulamanın bulut sunucusuna yüklediğiniz materyalin güvende olduğuna dair bir garanti yoktur. İkincisi işlevsellik açısından çevrimiçi video düzenleyiciler çok zayıf bir araç setine sahiptir ve büyük boyutlu yüksek kaliteli videoları düzenlemenize izin vermeyen belirli işlem sınırlamaları getirirler.

Bu nedenle bir bilgisayara yazılım yükleme imkanınız varsa kesinlikle masaüstü programları kullanmanızı öneririz. Bu eğitimde size VSDC’de bir videoyu nasıl tersine çevireceğinizi göstereceğiz.

How to quickly reverse a video in VSDC

VSDC'nin güncel sürümünü buradan indirebilirsiniz. Birçok ücretsiz düzenleyicinin aksine VSDC'nin işlenmiş videoların biçimi ve kalitesi üzerinde herhangi bir kısıtlaması yoktur ve GoPro'da çekilmiş videoları bile kolaylıkla düzenlemenize olanak tanır. Ayrıca VSDC dışa aktardığınızda videonuza filigran yerleştirmez.

VSDC’yi bilgisayarınıza yüklendikten sonra programı başlatın ve başlangıç ekranında "İçeriği içe aktar" düğmesine tıklayın.

Daha sonra bilgisayarınızdan işlemek istediğiniz video dosyasını seçin. İçe aktarmayı tamamlamak için yeni pencerede “Bitir”e tıklayın. Video otomatik olarak zaman çizelgesine yerleştirilecektir. Artık düzenlemeye başlayabilirsiniz. Özellikler penceresini açın (arayüzün sağ üst köşesindeki menü sekmesidir). Ayarlarda “Geriye doğru oynatma” bölümünü bulun. Varsayılan olarak bu alan "hayır" olarak ayarlanmıştır (bu, orijinal videonun doğrudan sırayla oynatıldığı anlamına gelir). Tek yapmanız gereken açılır menüyü açmak ve “evet” değerini seçmektir.

VSDC Editor. Reverse Video Menu

Neredeyse tamamlandı! Şimdi videonuzu kaydetme zamanı. Ekranınızın üst kısmındaki "Projeyi dışa aktar" sekmesini seçin. Burada istediğiniz dosya biçimini, videonuzun adını ve onu kaydetmek istediğiniz konumu ayarlayın. Bu menüden dışa aktarılan dosyanın kalitesini de seçebilirsiniz.

VSDC Editor. Export Reversed Video Menu

Hazır olduğunuzda sağ üst köşedeki "Projeyi dışa aktar" düğmesine tıklayın. Dosyanın boyutuna bağlı olarak dışa aktarma işlemi birkaç saniye ile birkaç dakika arasında sürebilir.

Şimdi tüm süreci özetleyelim.

Ek Öneriler

Bir videoyu ters çevirmek muhtemelen videonuzu düzenlerken ihtiyaç duyabileceğiniz tek işlem değildir. En sık kullanılan işlevlerden biri videoyu kesmek ve bölmektir. Efekti uygulamadan önce çerçeveyi kırpmanız gerekirse bunu programın arayüzünün üst kısmındaki Kesme ve bölme araçlarını kullanarak yapabilirsiniz. İmleci videoyu kırpmayı planladığınız zaman çizelgesine getirin ve menüdeki ilgili simgeye tıklayın.

Düzenleyicinin bir başka kullanışlı özelliği de ters video oluşturduğunuzda kullanışlı olabilecek video hızı ayarıdır. Hız yüzdesi göstergesini, Özellikler penceresinde "Geriye doğru oynatma" seçeneğinin hemen altında bulabilirsiniz.

VSDC Editor - Adjust Speed Menu

Orijinal değeri istediğiniz şekilde değiştirin ve her şeyin tam olarak istediğiniz gibi göründüğünden emin olmak için ön izleme düğmesini kullanın. Talimatlarımız arasında ağır çekim efekti ve hızlandırma efekti oluşturma hakkında daha ayrıntılı kılavuzlar bulacaksınız.

Son olarak geriye doğru çalınan ses, genellikle kulağa pek hoş gelmediği için videonuzun ses parçasını düzenlemeniz gerekebilir. Durumu düzeltmek için birkaç seçeneğiniz vardır ve bunların tümü aynı Özellikler penceresinde bulunur. İşte yapabilecekleriniz:

  1. Zaman çizelgesinde videoyu seçin, Özellikler penceresine gidin ve “Ses parçası” ayarına tıklayın.
  2. Orijinal sesi videodan tamamen çıkarmak için açılır menüden “Ses kullanma” seçeneğini seçin.
  3. Eğitimin başında açıkladığımız kesme ve bölme araçlarını kullanarak ses dosyasının konumunu ve süresini düzenleyin.
  4. Dışa aktarmadan önce çalışmanızı ön izlemeyi unutmayın.

Bu eğitimde VSDC'de sesle nasıl çalışacağınızı öğrenebilirsiniz.

Artık ters video efektini herhangi bir videoya kolayca uygulayabileceğinizi umuyoruz. Yine de konuyla alakalı hala sorularınız varsa yukarıda bahsettiğimiz her şeyi gösteren ayrıntılı bir eğitim videosu aşağıdadır.


Program hakkında daha fazla bilgiyi Ücretsiz Video Düzenleyici’nin açıklama sayfasından edinebilirsiniz.

Color correction with RGB curves in VSDC Free Video Editor

Oftentimes even when we use professional cameras for video shooting, we get upsetting results: gloomy or overexposed compositions, glares, black background. And if it’s an important event you were trying to capture, there comes huge disappointment. There can be many reasons why your footage came out in poor quality but what really matters is whether it can be fixed. And luckily, in many cases, it is possible, even if you aren’t a professional.

In this article, we will show you how to process photos and videos using simple color correction techniques. Specifically, we’ll be working with RGB curves to change brightness and contrast levels in VSDC Free Video Editor.

Download VSDC to your PC (the program runs on Windows only)

How to open the RGB curves dialog window

After you have installed and launched the program, import the file that needs to be edited. By clicking on it, go to the bottom part of the timeline and select "Color Correction." On the vertical panel in the opened window, click on the icon shaped like three different colored dots - "RGB curves." Upon clicking, the curves dialogue window will unfold.

Changing the brightness and contrast - the basic principles

RGB curves area

Working with brightness and contrast of the image is one of the basics of color correction. To change these two parameters in VSDC, the so-called “method of shifting control points in the composite curve mode” is used. Control points are arbitrary points that belong to the curves of the color channels: red, green, and blue.

The composite curve mode is set by default, and when you open the RGB working area, it is indicated by a white circle (see the illustration on the right). In the graph, the horizontal axis reflects the original brightness values ​​of the pixels, and the vertical axis - the desired (output) values ​​that you get in the editing process. The maximum pixel brightness value is 255. Initially, when an image is loaded into the program, all the original pixel brightness values ​​are equal to the output. That’s why the composite curve is a straight diagonal line passing through the points with coordinates (0; 0) and (255; 255). Points in the lower left corner correspond to black color (shadows), points in the upper right corner correspond to white color (light areas of the image).

A double-click on a specific area of the composite curve provides the necessary control point. Moving the control points (up and down, right or left) of the curve will change the overall color of the image by adjusting the brightness and contrast.

There are several ways to change the position of control points:

  • dragging manually with the mouse.
  • using the arrow keys on the keyboard (up, down, right, left).

By changing the coordinates of the points in the lower left area of the graph, you adjust the dark tones in the image. Meanwhile, the upper right area can be used to adjust the light tones, and when you work with the middle region of the curve, it affects medium tones of the video.


Adjusting the brightness of an image in practice

Let’s now jump from theory to practice. By moving the control point up, as shown in the illustration below, you increase the output value of the pixels relative to the input value. In other words, higher (brighter) values are now assigned to the pixels in a given area, which means that the brightness of the video is increased. In the example below, we took a point in the region of dark tones with coordinates (0; 0). An increase in the output value of this point (upward shift) led to the brightening of the dark areas of the image: the black pixels (with the initial value of 0; 0) acquired a more gray tint.

Now, for a clearer example, let's do the opposite and darken the bright areas of the image. By shifting the control point down, you reduce the output pixel values in a given area, which means you lower the brightness. In the example below, a point of the light-colored area with the coordinates of the maximum value (255; 255) was taken as a guide. Reducing the output value of this point led to the darkening of the bright areas of the image.

Contrast level adjustment

The contrast level of the image directly depends on the composite curve inclination angle. Remember that the original curve has a tilt angle of 45°? Increasing the tilt angle increases the contrast level and on the contrary: decreasing the angle reduces the contrast level.

If in the editing process the curve takes on a non-linear look (for example, an S-shaped composite curve), then the contrast level is characterized by the angle of inclination of the tangent built to a specific control point, as shown in the illustration below.

  • If the tilt angle is less than 45° - the contrast level of the corresponding image area is lowered (1);
  • If the tilt angle is more than 45° - the contrast level of the corresponding image area is increased (2).

So, what do you do if constructing imaginary tangents is not one of your talents? To find out the degree of change in contrast, you can use the simplest mathematical operations:

  • Determine the largest and smallest values along the horizontal axis (input values) and the vertical axis (output values).
  • Calculate the difference between the highest and the lowest values for each of the axes (input and output option):
    (Inputmax – Inputmin) = Differenceinput.
    (Outputmax – Outputmin) = Differenceoutput.
  • Compare the input and the output difference values: the one with a larger difference in values is considered more contrastive.

As an example, consider an image that has the following data:
Inputmin=0;
Inputmax=150.

As a result of adjustments, the image acquires the following values:
Outputmin=30;
Outputmax=250.

Determine the difference between the minimum and maximum values:
Differenceinput=150
Differenceoutput.=220

Comparing the resulting values, we can conclude that the output version of the image has more contrast than the input version (220> 150).

This way, using several control points, you can simultaneously adjust the brightness and the contrast levels in the areas of dark, light and medium tones independently. An extra control point can be deleted by clicking on it and pressing Delete.

Next, we will look at several ways to simultaneously change the levels of brightness and contrast you can apply in practice.


1. Linear brightness and contrast increase.

To simultaneously increase both brightness and contrast, you need to move the control point with coordinates (255; 255) to the left, say, to the value (200; 255).

Therefore, you will get:

  • the slope of the curve is greater than 45°, which means a higher level of contrast;
  • the input value for the white point will be reduced to 200, and the output will take the value - 255. This will automatically increase the brightness level, since the output value of bright tones will be higher than the input.

2. Linear brightness increase with a decrease in contrast

To increase the brightness of the entire image while reducing the contrast, you need to drag the point with the coordinates (0; 0) up, for example, to the value (0; 50).

This way you get the following results:

  • the slope of the curve will be less than 45 degrees, which means that the contrast level will decrease;
  • the input value for the black point will remain unchanged - 0, while the output value will be increased to the level 50, which will increase the brightness level and mute / brighten the dark areas of the image.

3. Non-linear brightness increase

As a control point, we’ll take the one with the coordinates (127; 127) - it corresponds with the middle tones of the image. Then we’ll move it up to the value (127; 170).

We will get the following results (see the illustration below):

  • the overall tonal range remains unchanged;
  • the output value for the selected control point will be increased to 170, which indicates an increase of the brightness level in the mid-tone region;
  • the contrast level in the shadow area will be increased since the angle of inclination of the tangents constructed to the guiding points in this area will be more than 45° (2). The image details that were shadowed will become clearer;
  • the level of contrast in the area of ​​light tones will be lowered since the angle of inclination of the tangents built to the control points in this area will be less than 45° (1). Details in the light areas of the image will become less clear.

4. Linear brightness and contrast levels decrease

To simultaneously reduce the brightness and contrast of the entire image, you must drag the control point with the coordinates (255; 255) down. For example, drag it to the value (255; 200).

This way we get the following:

  • the slope of the curve will be less than 45°, which means a lower level of contrast;
  • the output value for the white tones control point will be reduced to 200, with an input value of 255. This means the brightness level will be lowered (since the output value is greater than the input value) and the bright areas of the video will be muted (without affecting the dark areas significantly).

5. Linear brightness decrease with increased contrast

To reduce the brightness of the entire image while simultaneously increasing the contrast, move the control point with coordinates (0; 0) - black color - to the right, for example, to a value (50; 0).

This way we get the following results:

  • the slope of the curve will be more than 45°, which indicates that the level of contrast increases;
  • the input value for the black point will be increased to 50, while the output value will be 0 indicating a decrease of the brightness level (output value is less than the input value). As a result, the dark areas of the image will become even darker and lose their distinguishable details.

6. Non-linear brightness decrease

As in the case with the non-linear brightness increase, we leave the black (0; 0) and white (255; 255) color points unchanged. As a control point, we take the one belonging to the mid-tone region, with coordinates (127; 127). By moving this control point down, for example, to the level (127; 70), we get the following results:

  • the overall tonal range remains unchanged;
  • the output value for the selected control point will be reduced to a value of 70, which indicates a decrease in the brightness level;
  • the contrast level in the region of highlights will be increased since the angle of inclination of the tangents constructed to the control points in this region will be more than 45° (2). Image details in bright areas will become clearer;
  • the contrast level in the shadow area will be lowered since the angle of inclination of the tangents constructed to the control points in this area will be less than 45° (1). This means that the details in the dark areas of the image will become less clear, yet they will not turn into black spots either.

7. Linear contrast increase

Since the level of contrast directly depends on the difference between the values of the lightest and darkest points of the image, the simplest way to increase the contrast of the image is to reduce the gap between the input values of the black and white points. In other words, we need to increase the input value for the black point (shift it to the right) and decrease it for the white point (shift it to the left). For a more detailed correction, see paragraphs 1 and 5.

8. Linear contrast decrease

Similarly to the previous example, the easiest way to reduce the overall level of image contrast is to bring the output values for the black and white points closer together, i.e. decrease the output value for the white point (shift it down) and increase it for the black point (shift it up).

After that, refer to the instructions in paragraphs 2 and 4.

9. How to work with an S-curve

If you need to increase the contrast of the mid-tones only, you should use an S-shaped curve. First, double click to create three control points on the curve. For example, place one in the mid-tone area (128; 128), one in the shadow area, and one in the area of light tones.

Leave the position of the first control point unchanged, shift the second one down (according to the principle described in paragraph 6), and drag the third point up (according to the principle described in paragraph 3). This way, the dark and the light areas of the image will become flatter. The angles of inclination of the tangents built to the control points in these areas will be less than 45°. That means the image details located in the darkest and lightest areas will become less clear, meanwhile, the mid-tones of the image become more contrasting.

Of course, the process of using an S-shaped curve will be slightly different for each image. However, the basic principle remains the same: by increasing the number and changing the position of the control points, it is possible to achieve both amplification and weakening of the visualization of details in the dark, light and medium tones independently.

10. Using the inverse S-shaped curve

The operation principle of this curve is opposite to the operation principle of the above described S-shaped curve.

To reduce the contrast of mid-tones with a simultaneous increase in clarity in the area of shadows and highlights, do the following:

  • double-click to create at least three control points. As in the previous example, you can take the midpoint (128; 128), the point in the shadow area and the point in the light area.
  • leave the position of the first point unchanged, move the second point up, and the third one - down.

This way, the light and dark areas of the image become more contrasting because the angles of inclination of the tangents built to the control points in these areas will be more than 45°. The image details in these areas will become clearer, while the mid-tones become flatter.

How to use color channels to edit a video or an image

Working with color channels is one way to perform color correction in the RGB mode.

Each color in the RGB color space is achieved by mixing three basic colors: red (Red), green (Green) and blue (Blue). According to the theory we all know, if you mix red and green you get yellow; the mix of red and blue results in purple; the mixture of blue and green results in blue, and so on.

Color channels overview

The brightness of each color is set at a value between 0 and 255. The point with zero values for all three curves (0; 0; 0) corresponds to the black color, and the point with the maximum values (255; 255; 255) – corresponds to white.

To switch to the color correction mode of an individual RGB curve, you need to select the desired color channel in the RGB color space.

Double-click on a particular section of the composite curve will create a control point. When you move the control points (up & down, right & left) of the curve, you change the overall color of the image by adjusting the brightness of a particular color in the selected area.

The principles of working with RGB channel curves are similar to the principles of changing the brightness and contrast levels of a video:

  • By moving the control point of a particular channel up, you assign richer values of the selected color to the pixels in a given region.
  • By shifting the control point down, you assign lower brightness values to the pixels of the selected color channel.

Please note that this process enhances other color channels in the editing area. In the example below, you can see that the decrease in the brightness of image mid-tones in the red channel has led to an increase in the values of blue-green colors and overall darkening of the image.

News

150+ Şablon, Metin Dönüştürücüsü, Sprite Otomatik Algılama ve GUI Güncellemesi

Değişim, gelişim demektir ve bu süreç sizlerin geri bildirimleri olmadan mümkün olamazdı. Geri bildirimlerinizi titizlikle değerlendirdik ve düzenleme deneyiminizi iyileştirmek için birkaç...

En İyi Özel Efekt Yazılımı

Giriş 2024 yılında görsel efekt oluşturma seçenekleri son derece çeşitli ve en iyi seçenekleri belirlemek giderek zorlaşıyor. Projelerinize orijinallik katmanıza yardımcı olacak en iyi...

VSDC 9.2: AI segmentasyon modelleri, 300'den fazla geçiş, VSDC Cloud ve yeni şablon koleksiyonu

VSDC 9.2 burada ve hassas nesne kaldırma, gelişmiş renk düzeltme ve videolarınızı geliştirmek için çeşitli efektler sağlayan yeni AI destekli segmentasyon aracı gibi çığır açan özellikler...

Siyah Beyaz Filmler Nasıl Renklendirildi?

Klasik siyah beyaz filmlerin hayranı mısınız? Renkli olsalardı nasıl görüneceklerini hiç merak ettiniz mi? Birçok film yapımcısı da aynı şeyi düşünmüş ve çok sayıda klasik filmin...

En İyi Çevrimiçi Video Düzenleyiciler 2024: Avantajlar ve Dezavantajlar

15 Temmuz 2024 Amy Shao tarafından yayınlandı Şu anda video içeriğinin popülaritesi artıyor ve birçok kullanıcı kişisel ve profesyonel amaçlar için video klipler oluşturma ihtiyacıyla...

New Transition Addition Methods, RAW/BRAW Files Support and Free Waveform

Moment gelmiştir: VSDC 9.1'ün merakla beklenen güncellemesini sunmaktan mutluluk duyuyoruz! Yeni sürümün geliştirilmiş işlevselliği, video montajını hızlandıracak ve düzenleme sürecini...

VSDC 8.3 - 100+ Yeni Şablon, Anahtar Düzenleyici Penceresi, AV1 ve Geliştirilmiş GUI

VSDC 8.3 güncellemesini size sunmaktan mutluluk duyarız! Ekibimiz yeni sürüm üzerinde aktif bir şekilde çalıştı ve şimdi VSDC'de çalışmayı daha kolay hale getirecek tüm değişiklikleri...

2024'te ücretsiz video düzenleme: Bankayı Bozulmadan Yaratıcılığınızın Kilidini Açın

7 Mayıs 2024 tarihinde Tom Shinat tarafından yayınlandı Günümüzün dijital dünyasında yaratıcılık en üst düzeyde hüküm sürüyor. Bireylerin ve markaların izleyicileri büyülemesi ve...

6 iMovie Alternatives for Windows You Should Try in 2024

15 Haziran 2024 tarihinde Amy Shao tarafından yayınlandı Mac'e yönelik tüm video düzenleme araçları arasında iMovie bizim favorimizdir ve onu bu blogda birçok kez tavsiye ettik. iMovie çoğu...

6 En İyi Ücretsiz 3D Animasyon Yazılımı

3D animasyonla çalışmak, çağdaş sanatta en zorlu becerilerden biridir ve yalnızca 3D modeller hakkında bilgi sahibi olmayı değil, aynı zamanda çekim kompozisyonu, oyun motorları, render cihazları...
 

Screen Recorder Box

Bu program ile masaüstünüzün video videosunu çekebilir ve bilgisayarınıza çeşitli biçimlerde kaydedebilirsiniz. Bir video düzenleyiciyle eşleştirilmiş program, sunumlar ve demolar oluşturmak için idealdir.

Ekran Kaydedici hakkında daha bilgi edinin...


Video Capture Box

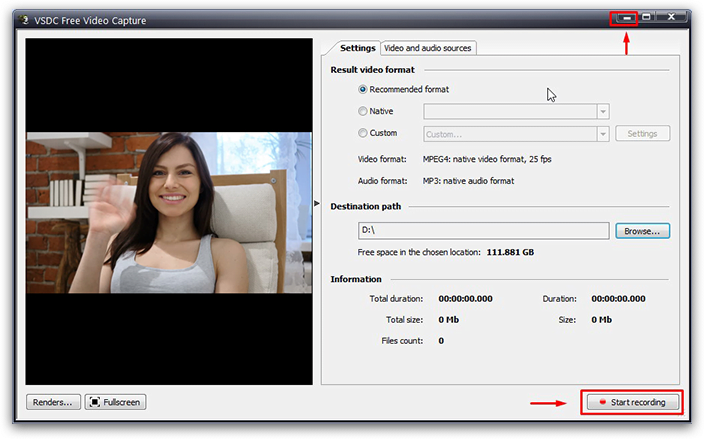
Program, dış aygıtlardan video yakalar ve ücretsiz bir biçimde bilgisayara kaydeder. Video tarayıcılardan, web kameralardan, yakalama kartlarından ve diğer araçlardan da video kaydedebilirsiniz.

Video Yakalama hakkında daha fazla bilgi edinin…


İnceleyen


"VSDC Ücretsiz Video Düzenleyici her ne kadar alışılmadık bir video düzenleyici olsa da şaşırtıcı derecede güçlü"

- PC Advisor


"Bu video düzenleyici size tonlarca kontrol ve düzenleme gücü veriyor"

- CNet


"Bu video düzenleyici tüm popüler video formatlarını destekler ve çok çeşitli özelliklere sahiptir. Aydınlatma seviyesini değiştirebilir, videoları birleştirebilir, filtreler ve geçişler uygulayabilirsiniz"

- Digital Trends