")


视频编辑器
使用免费软件制作和编辑从贺卡到公司简介等不同复杂程度的视频。可以剪切和合并视频文件,应用音效和视效,添加滤镜,进行图像校正,创建幻灯片秀、添加背景音乐。使用多彩色色键和高级属性设置可以将视频升级到专业水平。软件支持所有常用的视频和音频格式。
视频转换器
此应用程序针对转换视频文件的格式,支持几乎所有常用的视频格式(读取和保存均可)。此外,程序可以大大简化转码任务,使视频能兼容特殊的多媒体设备,如iPhone、Microsoft Zune或Archos。操作非常简单,软件具有现代化界面以及所有处理视频必须的功能。
CD音频截取器
此音频工具用于从CD截取音频轨迹并存为任何格式。支持几乎所有常用的音频格式。此应用程序也能够从FreeDB服务器中获得音频轨迹的信息,并自动改名及更新文件的标记。
 视频编辑器
视频编辑器 视频转换器
视频转换器 音频转换器
音频转换器 CD音频截取器

多功能
一套免费视频软件包含丰富处理工具的种类。

高速
应用程序采用高速高效算法,适合于单核和多核处理器

实惠
VSDC视频软件可年免费下载到Windows系统操作的PC和笔记本。
News:
- 这个节日季,迎接全新的开始!VSDC视频编辑器带来了最新的9.4版本。我们倾听了您的建议,专注于优化您最常用的工具,同时为明年更多创新功能奠定基础。 增強的...
- 改变就是进步,而这个过程离不开您的参与。在仔细审阅您的反馈后,我们已经解决了多个关键问题,并引入了旨在提升您编辑体验的更新。 150+模板、文本转换工具...
- 简介 2024年,用于创建视觉特效的选择范围极其多样化,越来越难以确定顶级选择。 在这里,您可以找到一份关于顶级视觉FX软件的指南,帮助您为项目增添原创...
- VSDC 9.2 已发布,带来了突破性的功能,例如新的AI 辅助分割工具,它能精确地移除对象、进行高级颜色校正,并提供多种效果以增强您的视频。此外,我们还推出了...
VSDC Premium 模板:它们是什么及如何使用
使用 VSDC 範本加快編輯速度: 免費、PRO 和高級選項
在 VSDC 模板窗口 中看到带有皇冠标记的模板了吗?你知道它们的用途吗?答案就在这里!
这些是 Premium 模板,旨在帮助你创建引人注目的视频!使用它们,你可以在几分钟内制作出专业外观的视频,节省设置动画、过渡效果和其他许多元素的时间。
这些现成的模板为各种任务提供了所需的一切:美丽的背景、时尚独特的标题、滑动、图像或视频之间的平滑过渡、充满活力且富有情感的LUT,甚至是预配置的幻灯片展示,只需添加你的媒体!最棒的是——这些模板大多数包含 PRO 功能,即使你使用的是 免费版本,只需购买这些模板,你仍然可以无限制地导出你的项目!
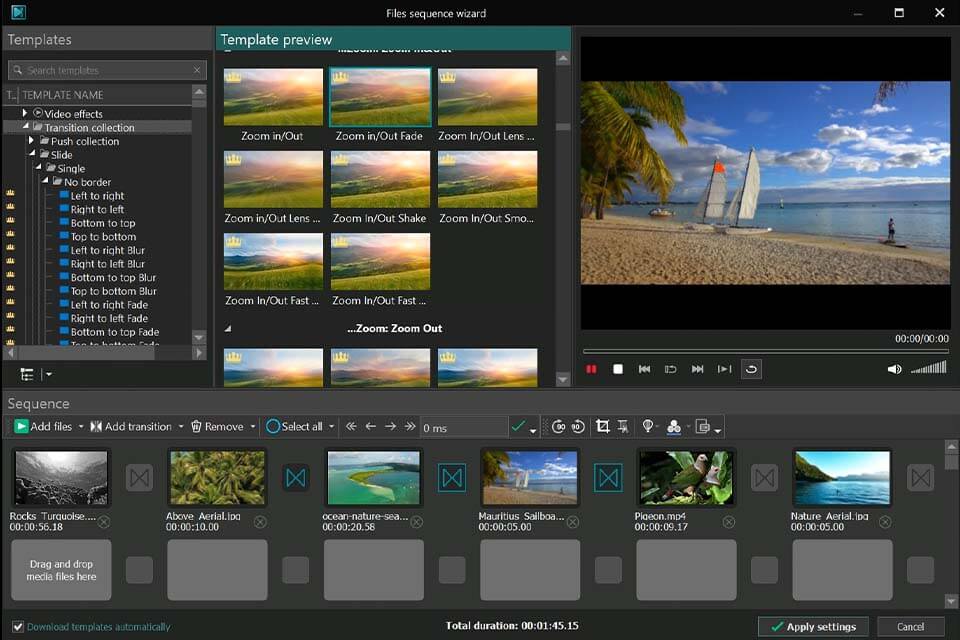
在 VSDC 中导航模板窗口
在我们深入了解如何激活和应用 Premium 模板 之前,让我们首先探索 模板窗口 中所有模板是如何组织的。模板分为三个主要类别:免费模板、PRO 模板 和 Premium 模板。以下是如何轻松区分它们的方法。
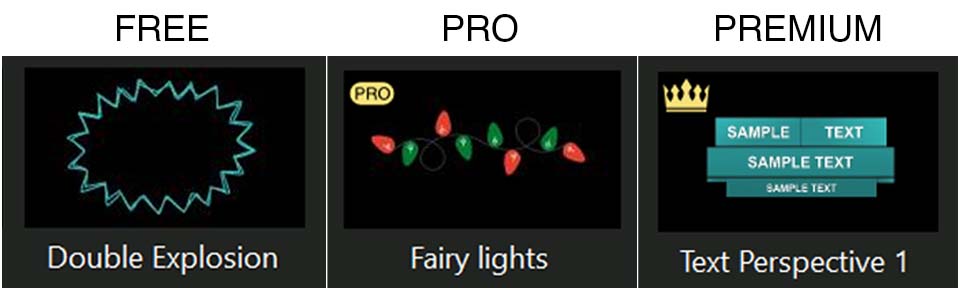
免费模板
免费模板对所有 VSDC Video Editor 用户开放,并且没有任何特别标记,因此关于它们的问题很少。
您可以通过模板窗口中的搜索栏访问各种免费的选项,并轻松找到所需的内容。
PRO 模板
PRO 模板在 模板预览 窗口中标有 PRO 标签 和一个小的 锁定图标(要查看它们,请点击模板窗口右侧的小箭头)。这些模板对所有用户开放应用,但只有 PRO 版本 用户才能导出它们。
Premium 模板
如前所述,Premium 模板上有皇冠标记,在模板预览窗口中,它们也带有锁定图标。皇冠的颜色表示模板是否已从服务器下载:蓝色皇冠表示模板尚未下载,黄色皇冠表示下载完成,模板可以使用。
请注意,如果没有显示皇冠图标,最好通过模板预览窗口浏览模板。
这些模板对所有用户开放编辑,但只有在购买了完整的模板集或包含应用模板的集合后,才能将项目导出。购买后,Free和PRO 用户都可以使用这些Premium 模板导出他们的项目。
如何使用 VSDC 目录激活 Premium 模板
VSDC 目录是探索和购买最适合您需求的模板集合的最简单方式。它提供了所有可用包的完整概览,您可以预览每个集合,观看简短的演示视频,并阅读描述,了解它们的目的和功能。
您喜欢 过渡效果、动画背景还是其他什么?浏览可用的集合,选择最适合您项目的选项!
一旦您做出选择,点击 買,填写结账表单并完成您的订单。购买后,您将通过电子邮件收到一个独特的激活密钥。要激活您的模板集合:
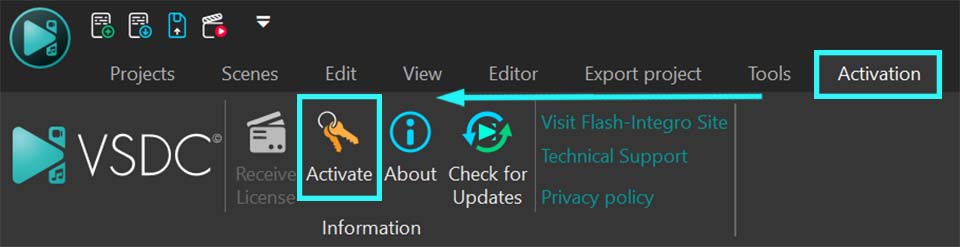
- 进入 VSDC 中的 激活 标签
- 点击 “激活” 并输入您在购买模板集合时收到的密钥
- 重新启动视频编辑器。
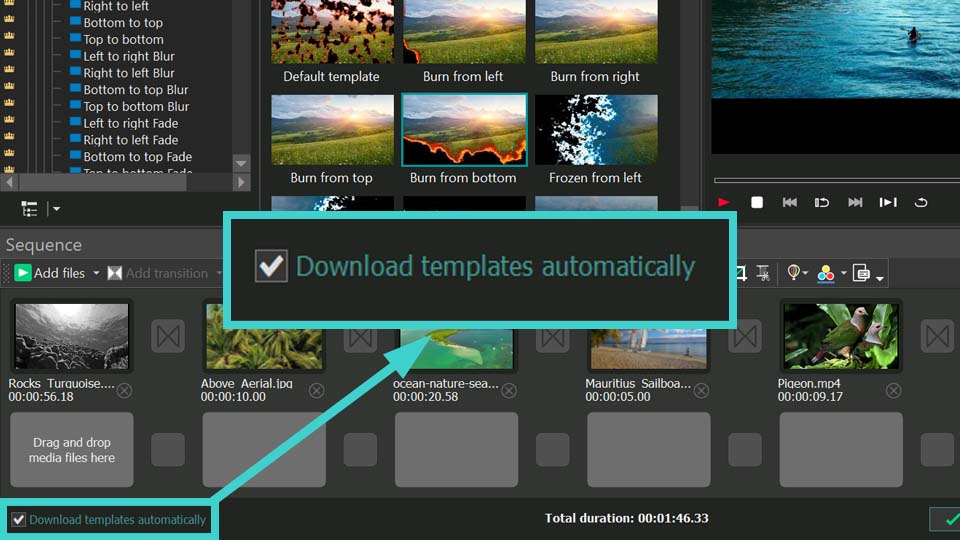
激活后,打开模板窗口,找到您购买的模板集合并开始使用模板!为了确保顺利访问,在应用模板之前,请先下载模板,通过选择所需的模板,右键单击并选择 “下载模板” 选项。 一旦皇冠变为黄色,模板就可以使用了。

如何在视频编辑器中激活 Premium 模板
这里的过程更简单,因为您可以在购买之前预览模板在项目中的效果。例如,当您应用模板并在导出项目时,会出现一条通知,指示使用了 Premium 功能(标记为带有锁图标的 Image、Template 或 Sprite)。

如果您决定使用此模板导出您的项目,您需要购买它。只需在导出阶段出现的窗口中点击 解锁。这将带您到结账页面,在那里您可以完成购买。购买后,您将通过电子邮件收到激活密钥。通过 激活 标签在 VSDC 中激活您的模板集合,并重新启动视频编辑器。
使用模板:应用、定制和适应您的项目
使用模板时,主要目标通常是通过简化复杂的任务来节省时间和精力。毕竟,既然可以使用现成的解决方案,为什么还要重新发明轮子呢?但最棒的是——您可以以一种方式定制模板,使它们独一无二、完全属于您!
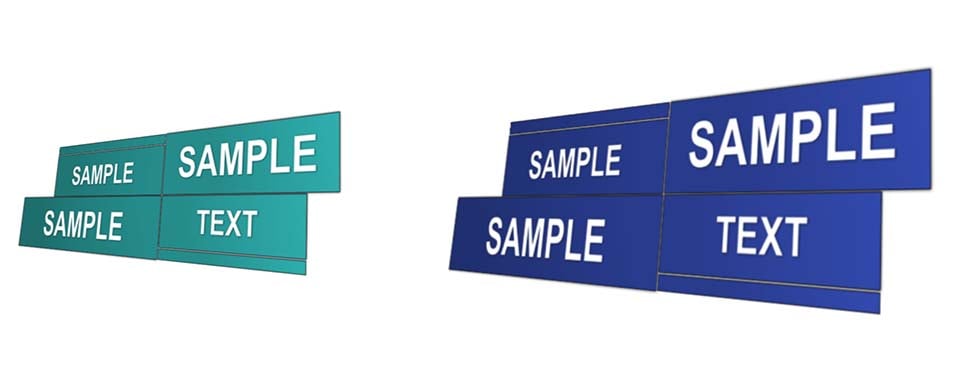
例如,我们可以选用Premium Perspective Typography包中的基于文本的模板。假设您想创建一个突出的标题。打开模板窗口,找到Perspective Typography文件夹并预览不同的模板。选择一个模板——例如Text Perspective 5——并将其拖到场景或时间线中。
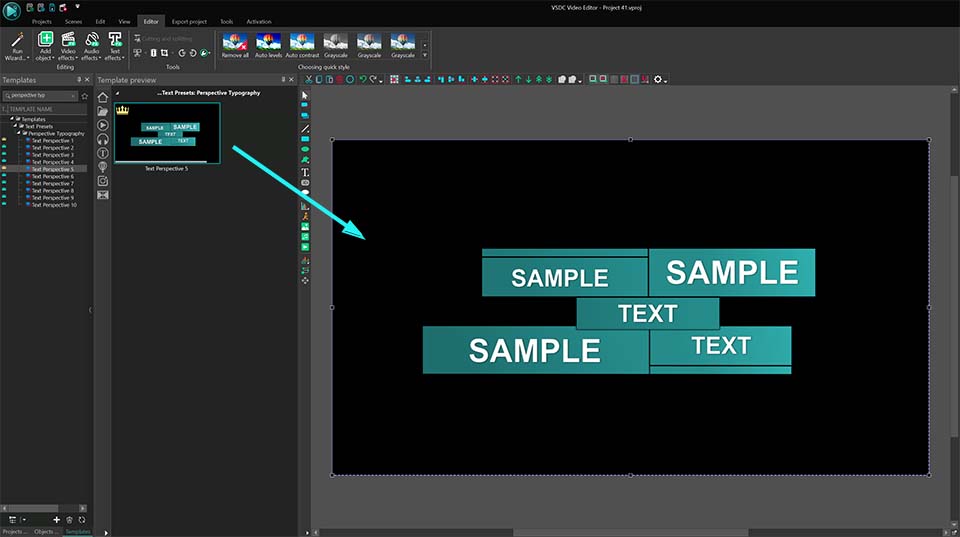
如果模板尚未购买,您会在时间线上看到一个锁定图标,并且右下角会显示一条通知,内容为:"这是一个仅供预览的高级模板。要导出项目,请购买它"。.
在购买之前,您可以完全定制模板。由于它以精灵的形式显示,您可以探索其结构并修改单个元素——例如动画速度、颜色、缩放强度等——然后再决定是否购买该包。
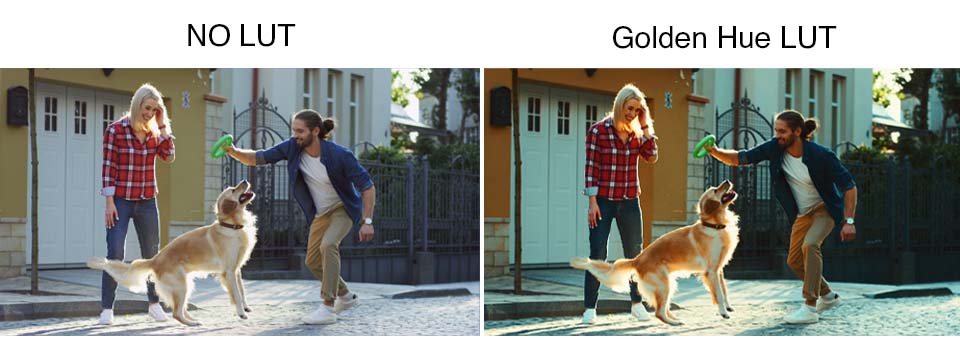
另一个例子是,看看 Premium LUT 模板。当您将它应用到视频对象时,它会自动应用到该对象内。与基于文本的模板不同,LUT 模板更容易调整,因为它们只包含一个效果。您可以通过 属性浏览器 直接修改它们(不要忘记在时间线上选择 LUT 对象)。只需点击 编辑LUT,然后根据您希望的色调和氛围调整 色彩分级。
在我们的例子中,我们使用的是 “Golden Hue” 模板(来自 “Filmic Tones” LUT 集合)。

唯一与之前描述的模板不同的是过渡效果(这适用于 Free、Pro 和 Premium 模板)。通常,过渡效果用于两个视频之间,以创建一个平滑的视觉流动,将一个视频顺畅地过渡到另一个。要应用过渡效果,按住 ALT 键,然后用左键单击拖动第二个视频的边缘,直到它覆盖在第一个视频上并出现一条线。最后,选择您想要的过渡效果并将其拖到两个对象之间的空间。
与前面的例子相比,过渡效果的自定义选项较少,但您始终可以调整过渡的持续时间。通过扩展两个对象之间应用过渡效果的区域,您可以增加其持续时间,使过渡更加平滑。相反,通过缩小这个区域,您可以缩短过渡时间,使其更加快速和突兀。
请查看带有 Push top to bottom 过渡效果的示例视频:
现在您已了解我们的 Premium 模板!希望这篇文章对您有所帮助。了解更多关于 VSDC Video Editor 的功能以及您可以用它创建的内容。
您是否看过我们所有的新 Premium 包?在 Facebook、YouTube、X、Reddit 或 Discord上分享您的想法吧!
如果您有任何问题或建议,随时通过电子邮件联系我们的支持团队——我们很高兴收到您的反馈,邮箱: 该Email地址已收到反垃圾邮件插件保护。要显示它您需要在浏览器中启用JavaScript。!
 下载VSDC免费视频编辑器


"VSDC Free Video Editor is a surprisingly powerful, if unconventional video editor"
- PC Advisor

"This video editor gives you tons of control and editing power"
- CNet

"The editor handles many common formats and boasts a good deal of capabilities when it comes time to alter lighting, splice video, and apply filters and transitions in post production"
- Digital Trends
© 2011-2025, www.videosoftdev.com, FLASH-INTEGRO LLC. Privacy policy | Terms of use | About us
此处被引用的所有商标均为其各自所有者的专有财产。
只有获得网站管理员的书面许可,才能从本网站复制任何材料。