Video Düzenleyici

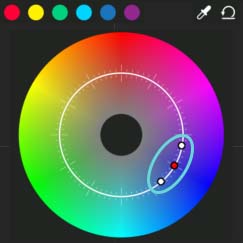
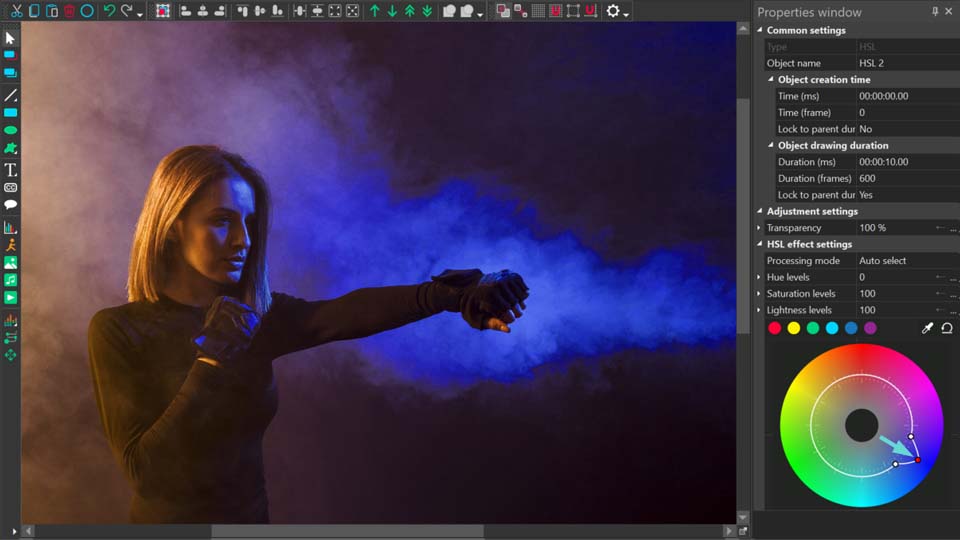
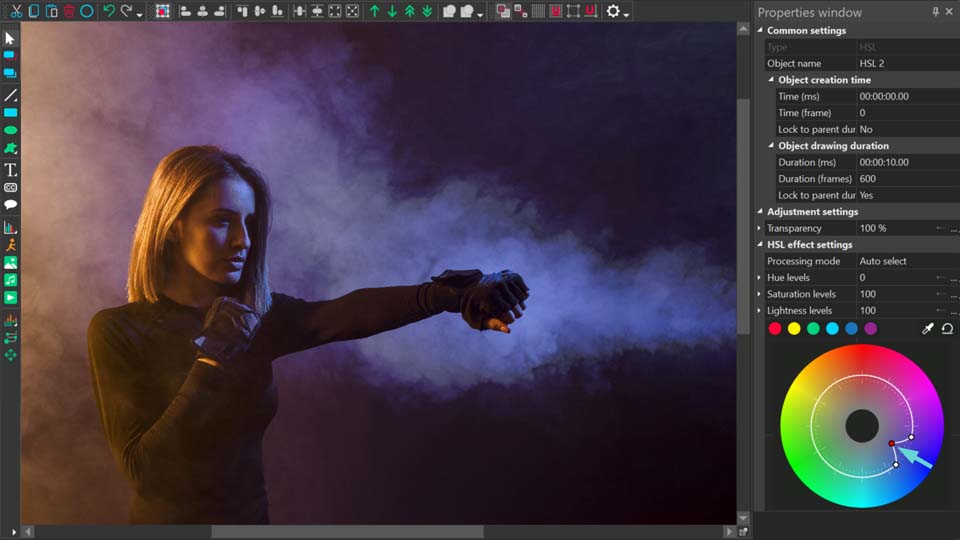
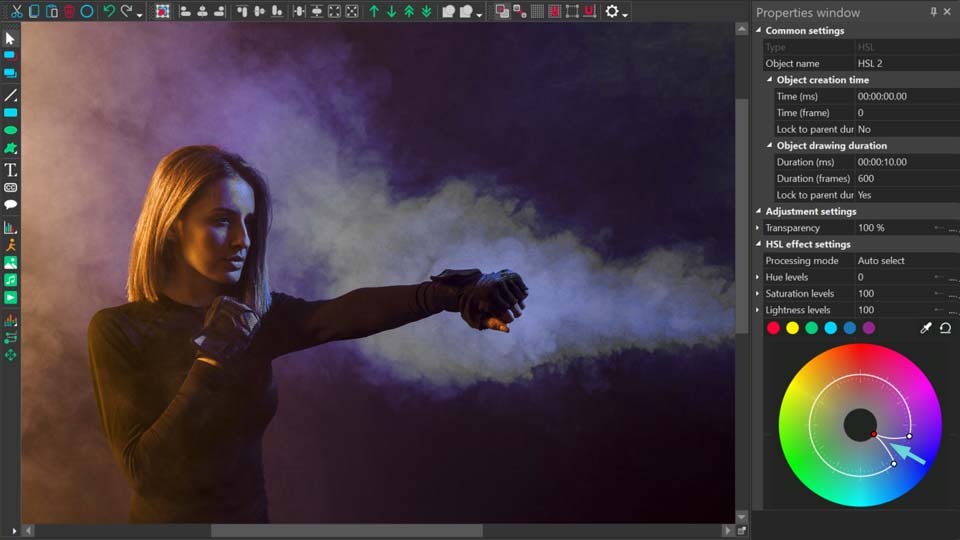
Aile tebrik kartından şirket sunumuna kadar her türlü karmaşıklıkta videolar oluşturmak ve düzenlemek için ücretsiz video yazılımını kullanın. Video dosyalarını kesin, birleştirin, görsel ve ses efektleri uygulayın, filtreleme ve görüntü düzeltme kullanın, slayt gösterileri yapın ve uygun bir film müziği ekleyin. Videonuza profesyonel bir görünüm kazandırmak için çok renkli Renk anahtarı ve gelişmiş parametre ayarlarını kullanın. Tüm popüler video ve ses formatları desteklenir.

Video Düzenleyici hakkında daha fazla bilgi edinin...

Video Dönüştürücü

Bu program video dosyalarını bir biçimden diğerine dönüştürmek için tasarlanmıştır. Hemen hemen tüm popüler video biçimleri (hem okuma hem de kaydetme) desteklenir. Ayrıca iPhone, Huawei P30 Pro veya Samsung Galaxy gibi belirli multimedya cihazları için videolar oluşturmak da mümkündür. Programın kullanımı son derece kolaydır, modern bir arayüze ve gerekli tüm video işleme fonksiyonlarına sahiptir.

Video Dönüştürücü hakkında daha fazla bilgi edinin...

Ses Dönüştürücü

Bir ses dönüştürücü kullanarak ses dosyalarını bir biçimden diğerine dönüştürebilirsiniz. Tüm önemli ses biçimleri ve codec bileşenleri desteklenir. Program ayrıca çalma listelerini ve meta etiketlerini yönetmenize izin verir, ayrıca video dosyalarından sesi dışa aktarmak ve parçaları herhangi bir biçimde bilgisayarınıza kaydetmeniz de mümkündür.

Ses Dönüştürücü hakkında daha fazla bilgi edinin...

Ses CD’si Yakalayıcı

Bu ses aracı kompakt disklerden ses parçalarını kopyalamaz ve bunları seçtiğiniz herhangi bir biçimde bilgisayarınıza kaydetmek için tasarlanmıştır. Neredeyse tüm popüler ses biçimleri ve codec bileşenleri desteklenir. Program ayrıca dosyaları otomatik olarak yeniden adlandırma ve meta etiketleri güncelleme için parça ayrıntılarını FreeDB sunucusundan ayıklayabilir.

Ses CD’si Yakalayıcı hakkında daha fazla bilgi edinin...

Çok işlevsellik

Çok işlevsellik

Tek bir ücretsiz video yazılım paketinde çok çeşitli multimedya işleme araçları

Yüksek hız

Yüksek hız

Programlar hızlı, optimize edilmiş çok işlemcili algoritmalar kullanır.

Kullanılabilirlik

Kullanılabilirlik

VSDC video yazılımı, Windows işletim sistemi tabanlı tüm bilgisayarlarda ve cihazlarda ücretsiz olarak indirilebilir.

VSDC Video Düzenleyici kullanılarak “Metin İçinde Video” efekti nasıl oluşturulur?

Metin Efektinde Video Nasıl Yapılır

Bu eğitimde en popüler maskeleme numaralarından biri olan Metin İçinde Video efektini inceleyeceğiz.

Bu efekt, video başlığınızın daha şık ve profesyonel görünmesine yardımcı olur ve bir vlogger iseniz özel efektlerinizi büyük ölçüde zenginleştirecektir.

İlk yöntem 'Source in' aracı kullanılarak VSDC Ücretsiz Video Düzenleyici’nin ücretsiz sürümünde kullanılabilir.

İlk olarak sahneye bir metin ekleyin. Metin aracı, sahnenin solundaki çubukta bulunur.

Past text in video

Farklı yazı tiplerini deneyin ve size en uygun boyutu seçin. Gerekirse kalın bir yazı tipi seçin.

Appropriate font size

Zaman çizelgesindeki metin katmanına çift tıklayın ve videoyu ekleyin.

Text insert the video

Videoyu tüm karakterleri kapsayacak şekilde metnin üzerine yerleştirin.

Sonra birleştirme modları arasından “Source in” öğesini seçin.

Composition modes

İkinci yöntem yalnızca VSDC Video Düzenleyici’nin Pro sürümünde 'Metin içinde video' maskesi yapmanıza olanak tanır.

İlk önce video dosyanızı ekleyin.

Add your video file

Daha sonra sahneye bir metin ekleyin.

Add a text

Uygun yazı tipi ayarlarını seçin.

Appropriate font settings

Ardından metni videonun üzerine yerleştirin ve siyaha boyayın.

Place the text above the video

Zaman çizelgesinde birleştirme moduna gidin ve “Ters maske”yi seçin. Artık bu etkileyici ve şık başlığınızın keyfini çıkarabilirsiniz.

Inverted mask

VSDC Ücretsiz Video Düzenleyici’yi indirmek için lütfen buradan devam edin - www.videosoftdev.com/free-video-editor/download

YouTube kanalımızda daha fazla eğitim videoları bulabilirsiniz - www.youtube.com/user/FlashIntegro/videos


Program hakkında daha fazla bilgiyi Ücretsiz Video Düzenleyici’nin açıklama sayfasından edinebilirsiniz.

VSDC’de dikey çekilen bir videoyu düzeltmenin 3 yolu

Kameralı cep telefonları yaygınlaştığından beri video üretimi de önemli ölçüde değişti. Bazen kasıtlı bazen de kasıtsız olarak videoları daha sık dikey formatta çekmeye ve izlemeye başladık. İlk durumda düşünülen videonun bir akıllı telefonda aynı dikey biçimde görüntülenecek olmasıdır, ancak operatör çekim sırasında kameranın konumunu karıştırırsa genellikle dikey videoyu kenarlarını doldurarak veya ters çevirerek düzeltmek gerekir.

Dikey videoyu mümkün olduğunca estetik olarak düzeltmenin bir yolu var mı?

Dikey videoyu mümkün olduğunca estetik olarak düzeltmenin bir yolu var mı?

Evet kesinlikle. Çoğu zaman bir arka planın yanılsamasını yaratıp görsel olarak yatay hale getirerek dikey bir videonun kenarlarını doldurabilirsiniz. Ancak dikey videoları “düzeltmek” için başka yollar da mevcuttur.

VSDC Ücretsiz Video Düzenleyici bu görevi gerçekleştirmenin bazı kolay yollarını sunar. Her birini aşağıda ayrıntılı olarak açıklayacağız.

Windows için VSDC Ücretsiz Video Düzenleyici’yi İndir

Yöntem #1: Bir arka plan yanılsaması yaratarak dikey videonun kenarlarını doldurun

  • Sahneye dikey olarak çekilmiş bir video ekleyin. Bunu yapmak için üst menüde bulunan “Nesne ekle” düğmesine tıklayın ve bilgisayarınızdan bir dosya seçin.
  • Eklenen dosyaya sağ tıklayın ve “Çoğalt” seçeneğini seçin.
  • Yeni video nesnesi için orijinal videonun sahip olduğu boyutla aynı boyutu ayarlayın. Aşağıdaki resme bakın. How to duplicate an object in VSDC
  • Ardından üst menüdeki “Kesme ve bölme” sekmesine gidin ve “Otomatik kırpma”yı seçin. Bu şekilde çoğaltılmış video sahnenin boyutuna göre uzatılacak ve bir arka plan efekti yaratacaktır.
  • Şimdi dikey videonuzu düzeltmeyi tamamlamak için yalnızca kenarlarını bulanıklaştırmanız yeterlidir. Bunu yapmak için “Video efektleri” sekmesini açın, “Filtreler” >> “Gauss bulanıklığı”nı seçin. Aşağıdaki resme bakın.
  • Zaman çizelgesinde yeni bir sekme ve filtrenin adını taşıyan bir katman görünecektir. Bulanıklaştırma efektini geliştirmek için Özellikler penceresine gidin ve Bulanıklaştırma seviyeleri seçeneğini istediğiniz gibi ayarlayın.
  • Artık videonuz sahneyi tamamen dolduruyor ve farklı görünüyor. Bu arada orijinal videoyu arka plan olarak kopyalamak yerine başka bir görüntü ekleyebilirsiniz.

How to apply Gaussian blur

Yöntem #2: Sahneyi dikey olarak çekilen videonun boyutuna göre yeniden boyutlandırın

Dikey bir videonun kenarlarını doldurmak beklentilerinizi karşılamadıysa başka bir yol daha mevcuttur. Videonun kaydedildiği boyutu kullanabilir ve aynı boyut parametrelerine sahip bir proje oluşturabilirsiniz. Teknik olarak videonuz “dikey formatta” kalır, ancak yanlardaki siyah kenarlardan kurtulursunuz.

Bunu aşağıdaki şekilde yapabilirsiniz:

  • Dikey olarak çekilmiş videonuzu zaman çizelgesine ekleyin.
  • Üst menüdeki Görünüm sekmesine gidin ve bir Proje gezginini açın.
  • Proje adınıza tıklayın ve sahnenin boyut parametrelerini bulmak için Özellikler penceresine gidin.
  • Orijinal videonun boyutuna uyacak şekilde sahne genişliğini küçültün. Bunun nasıl yapılacağı aşağıdaki video eğitiminde gösterilmiştir.
  • Şimdi video nesnesine tıklayın ve “Üst öğeyle aynı boyutu ayarla” düğmesini kullanmak için Özellikler penceresine gidin. Böylece video sahnenin boyutuna tam olarak sığacak şekilde ayarlanacaktır.

Bütün işlerimleri sırasıyla uyguladığınız takdirde yanlarında siyah kenarlıklar olmayan mükemmel bir dikey video elde edersiniz. Bununla birlikte bu projeye başka video dosyaları eklemeyi planlıyorsanız bunların hepsinin otomatik olarak yeni sahne boyutuna göre ayarlanacağını unutmayın.

Yöntem #3: Videoyu döndürün

Bazen yanlışlıkla çekim sırasında telefonu ters çevirir ve sonunda dikey olarak oynatılan yatay çekilmiş bir video ile karşılaşırız. Bunu düzeltmek çok basittir.Tek yapmanız gereken dikey videoyu yatay formata döndürmektir.

Tüm süreç sadece birkaç saniye ve birkaç tıklama gerektirir:

  • Sahneye bir video dosyası ekleyin.
  • Sahnenin üzerindeki araç çubuğunda “Döndürme”yi seçin ve sonucu ön izleyin.
  • Videonuz sahne boyutundan daha büyük görünüyorsa boyutunu manuel olarak küçültebilir veya Özellikler penceresini kullanarak parametreleri ayarlayabilirsiniz.

Rotate buttons in VSDC

Artık dikey videoyu bir düzeltmek, görüntünün kenarlarını doldurmak veya sahneyi yeniden boyutlandırmak için VSDC'yi nasıl kullanacağınızı bildiğinize göre harika bir projenin nasıl oluşturulacağına ilişkin diğer eğitimlere de göz atmak isteyebilirsiniz. YouTube kanalımızda 200'den fazla eğitim bulunmaktadır. Abone olmayı unutmayın!


Program hakkında daha fazla bilgiyi Ücretsiz Video Düzenleyici’nin açıklama sayfasından edinebilirsiniz.

How to Reduce Audio Noise with VSDC Free Video Editor

Sometimes footage may sound “noisy” simply because there were too many background sounds when you were recording it. Don’t rush to hit the “Delete” button, though. In most cases, you can easily fix it.

In this instruction, we’ll show you how to reduce audio noise from your recording using VSDC Free Video Editor. If you don’t have the tool yet, you can download it from the official page.

VSDC Free Video Editor provides two powerful Audio Denoise filters: Median filter and Audio gate.

Audio gate is one of the most commonly used techniques in audio production post-processing. This filter comes in especially handy when you work with live recordings trying to remove the unwanted sounds between passages, because it is so efficient at recognizing steady noise sources – such as rumble, hiss, and hum – and reducing them to the minimum.

Technically, when you apply Audio gating, you control when and to what degree audio passes through a channel. In other words, you create a gate to filter the sounds in the video.

Audio Gate feature

You may want to apply gating for three reasons:

  1. To reduce the unwanted external sounds
  2. To reduce some natural channel noise
  3. To use Audio gate as a special effect

Here is how it works. Gates are controlled by setting several parameters:

  • Threshold. Decibel level in which the gate opens or closes. The higher the threshold, the louder the sound (stronger the signal) must be to open the gate.

    Threshold settings

  • Attack. Controls the speed of the gate opening and consider very fast attack time for percussive instruments. Slower times (10 ms or more) for everything else.

    Attack settings

  • Release. The release time is key to a natural sounding audio decay. For noise elimination with an electric guitar, set the parameter much higher.

    Release settings

  • Reduction. Sets the amount of signal reduction.

    Reduction settings

  • Ratio. It determines how much compression is applied. For example, if the ratio is set to 4:1, every 4dB of signal that crosses the threshold will be compressed down to 1dB.

    Ratio settings

  • Knee. Determines how the compressor responds once the signal crosses the threshold. A hard knee clamps down right away, while a soft knee causes the compressor to gradually kick in as the signal gets further past the threshold.

    Knee settings

  • Make-up gain. A control that raises the level of the signal, once it has been processed, to the desired level for the next stage of the signal.

    Make-up gain settings

Now that we’ve walked through the process of applying Audio gate, let’s take a look at how Median filter works.

Median filter helps you eliminate impulse noise in your footage. In a nutshell, this can be ideal for removing unwanted, frequent sharp sounds like clicks and pops.

Median Denoise filter

  • FFT block size. FFT (Fast Fourier Transform) is an important measurement method which converts a signal into individual spectral components and thereby provides frequency information about the signal.

    FFT block size parameter

  • Window type. There are several different types of windows used to reduce spectral leakage when performing a Fourier Transform on time data and converting it into the frequency domain.

    Window type parameter

  • Overlap mode. The setting determines what percentage of the FFT size block of data points is re-used for the next trace. Overlap processing can be used to provide high resolution in both the frequency and time axis.

    Overlap mode parameter

  • Overlap coefficient. High overlap percentages and low FFT block sizes provide the highest time resolution but take longer to process the data file.

    Overlap coefficient parameter

Hopefully, this was helpful. Even though it may sound (or look) overwhelming, once you start – you’ll see how fast and easy audio noise reduction really is. Now go and try it yourself!

To download VSDC Free Video Editor, please, proceed here - www.videosoftdev.com/free-video-editor/download.

Find more awesome tutorials on our YouTube channel - www.youtube.com/user/FlashIntegro/videos.


You can get more information about the program on Free Video Editor' description page.


How to create a voice over, using video editing software

Many videos require voice commentaries. Educational clips, how-tos, game walkthroughs, video blogs - all are typically produced with use of voice over software. There are various solutions to record your voice and add it to the footage. In fact, there are even 3-rd party tools for voice recording and processing audio on a professional level. Those are used in professional audio recording studios, for example. Yet, some video editors also have embedded tools for recording voice commentaries. VSDC Video Editor is one of them.

There are two ways to use VSDC as a voice over software. The first one belongs to the free version of VSDC video editor, and the second - a more advanced way - is available in VSDC Pro version. Below we'll take a close look at both ways, and explain how you can make use of the audio recording feature for your videos.

In both cases you'll need a microphone which is either embedded or connected to your computer. The biggest difference between the two, is the sequence of steps required from a user:

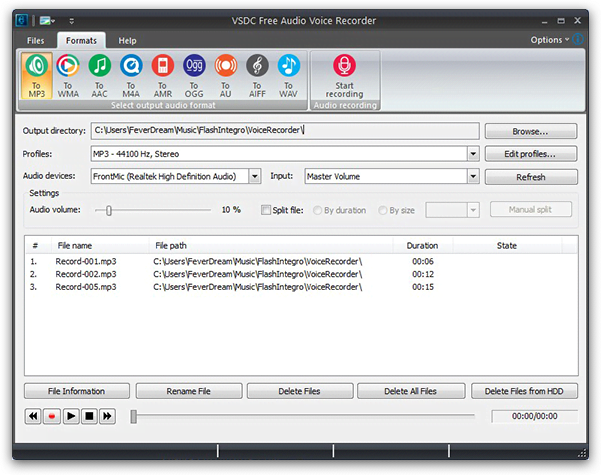
  • In VSDC free version, you can create an audio commentary using an embedded Voice Recorder. Once you record an audio piece, you'll be able to add it to you project and apply to the required video fragment.
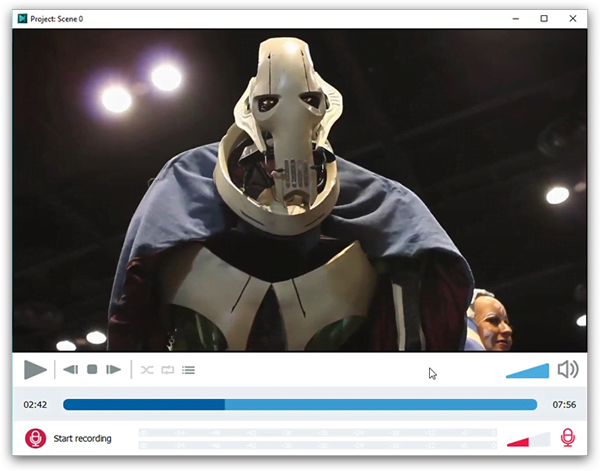
  • In VSDC Pro version, you'll use a Voice Over software feature. That means, the voice recording is carried out along with the video preview in one and the same window. It allows for adding audio comments at required parts of the movie easier and more precisely.

Method #1. How to use VSDC as a free voice over software

  • Open the editor, go to the ‘Tool’ tab and select ‘Voice Recorder’

    The embedded Voice Recorder is located in the 'Tool' tab

  • If you need the audio to be recorded in a prticular format, first you should choose it. VSDC voice recorded offers a lot of popular audio formats such as MP3, AAC, WAV and etc.

    There are plenty of available audio formats such as MP3, AAC, WAV and etc

  • Second, select the audio device you're going to use for recording.

    Select an appropriate audio device for recording

  • If necessary, you can check the option to split your recordings by their duration or by size.

    This option splits your recording by its duration or by size automatically

  • To start recording your voice, click the corresponding button.

    The corresponding button that starts recording is here

  • When your voice comments are ready, go to your project and add the audio files to the timeline - precisely where it needs to be added.

    Add recorded audio files to the project

Method #2 How to use VSDC Pro as a more advanced voice over software

  • Add your video where you want to add your voice.
  • Click the ‘More Tool’ button on the panel above the scene and select ‘Voice Over’.

    'Voice Over' can be found in the 'More Tool' menu on the panel above the scene

  • Preview the video and decide where you’d like to add your comments.
  • Move the cursor to the moment of the video where the recording is supposed to start.
  • Click the ‘Start Recording’ button.

    Click the ‘Start Recording’ button to record your voice

  • Record your voice using the microphone.
  • At the end of recording click ‘Stop recording’.

    To finish your commentary click ‘Stop recording’

  • Click on the ‘Playlist’ button to see the list of recordings.

    The 'Playlist' button shows the list of recordings

  • Close the voice over window.
  • Your recording will appear on the timeline automatically.

    Your recording will appear on the timeline automatically

Even though both ways help you get the job done, VSDC Pro version makes a more precise voice over software, saving your time and effort. So, if audio recording is not a one time job, but rather a regular task you 'll have to deal with frequently, you should probably consider it as a more convenient tool.

If you're looking for using voice over software in your video production process, you can also check out our YouTube channel to see how quickly and easily you can utilize VSDC for that purpose.


You can get more information about the program on Free Video Editor' description page.


How to Stabilize Video in VSDC Video Editor – Guide on Setting Up the Best Parameters

So, you got a shaky footage, and now you’re looking for the way to fix it? You’re on the right page then. Watch this guide and read the instruction below to see how to quickly stabilize your video using VSDC Video Editor.

Truth be told, most videos shot on the go without special equipment (camera stabilizer mount) come out shaky – just in a varying degree. That happens when you’re holding a camera and your hands start making sporadic movements, or when it’s attached to a drone or a vehicle so that you’re shooting and moving at the same time. Yes, action camera owners, that is especially relevant for you.

Gladly, there is a way to easily remove jittering and achieve a perfectly stable image in the process of post-production. In fact, the Video Stabilization tool is among the most demanded features of VSDC video editing suite. And if you’re curious about how it works, the secret is in the ability to shift video frames. It allows for excluding the shaky effect while any gaps created in the process are being filled with the information from the previous frames.

In our inbox, we often see questions from users on what the best stabilization settings are. So, we decided to address this in a separate tutorial. Below, you’ll see a guide compiled with help one of our dear users who submitted the parameters that worked best for his footage. After being tested, they appeared to be efficient for most shaky videos, so we’re happy to share the secret setup with you.

The parameters used in this tutorial are 'Shakiness' and 'Smooth zoom'. Here is a step-by-step breakdown of the process:

Open VSDC Video Editor and proceed to ‘Tools’. Select ‘Video stabilization’.

Find 'Video stabilization' among available tools

Click ‘Open file’ to add the footage you’re willing to stabilize.

Click Open file to add shaky footage

Find ‘Shakiness’ among available settings. This parameter detects how shaky a video is and how quickly your camera changes positions and takes control of these movements. Set the Shakiness rate to the maximum using the arrows.

Set the Shakiness rate to the maximum

Once you’ve done that, find the ‘Smooth zoom’ dropdown menu in the upper toolbar. This setting allows you for smoothly zooming in the footage.

Select 'Use the smoothed zoom' as shown on the screenshot below.

Select 'Use the smoothed zoom' for smoothly zooming in the footage

After performing these actions, you should get a stabilized video, no matter how shaky the original was. So, if there is nothing else you’d like to change in it, just proceed to the ‘Formats’ tab and choose the most appropriate output format. Remember that in VSDC, you can change export profile settings – format, codec, resolution, quality, width, and height - when necessary. If this is the case, click on the “Edit profile” button at the bottom right corner.

A wide range of output formats is available at the 'Format' tab

Once you’re done, click on the red ‘Export project’ sign.

To download VSDC Free Video Editor, please, proceed here - http://www.videosoftdev.com/free-video-editor/download

To subscribe for VSDC Pro annual license, please, place your order.

Got any questions? Drop us a line at Bu e-Posta adresi istenmeyen posta engelleyicileri tarafından korunuyor. Görüntülemek için JavaScript etkinleştirilmelidir. or send us a message via Facebook!

Find more awesome tutorials on our YouTube channel - https://www.youtube.com/user/FlashIntegro/videos


You can get more information about the program on Free Video Editor' description page.


News

150+ Şablon, Metin Dönüştürücüsü, Sprite Otomatik Algılama ve GUI Güncellemesi

Değişim, gelişim demektir ve bu süreç sizlerin geri bildirimleri olmadan mümkün olamazdı. Geri bildirimlerinizi titizlikle değerlendirdik ve düzenleme deneyiminizi iyileştirmek için birkaç...

En İyi Özel Efekt Yazılımı

Giriş 2024 yılında görsel efekt oluşturma seçenekleri son derece çeşitli ve en iyi seçenekleri belirlemek giderek zorlaşıyor. Projelerinize orijinallik katmanıza yardımcı olacak en iyi...

VSDC 9.2: AI segmentasyon modelleri, 300'den fazla geçiş, VSDC Cloud ve yeni şablon koleksiyonu

VSDC 9.2 burada ve hassas nesne kaldırma, gelişmiş renk düzeltme ve videolarınızı geliştirmek için çeşitli efektler sağlayan yeni AI destekli segmentasyon aracı gibi çığır açan özellikler...

Siyah Beyaz Filmler Nasıl Renklendirildi?

Klasik siyah beyaz filmlerin hayranı mısınız? Renkli olsalardı nasıl görüneceklerini hiç merak ettiniz mi? Birçok film yapımcısı da aynı şeyi düşünmüş ve çok sayıda klasik filmin...

En İyi Çevrimiçi Video Düzenleyiciler 2024: Avantajlar ve Dezavantajlar

15 Temmuz 2024 Amy Shao tarafından yayınlandı Şu anda video içeriğinin popülaritesi artıyor ve birçok kullanıcı kişisel ve profesyonel amaçlar için video klipler oluşturma ihtiyacıyla...

New Transition Addition Methods, RAW/BRAW Files Support and Free Waveform

Moment gelmiştir: VSDC 9.1'ün merakla beklenen güncellemesini sunmaktan mutluluk duyuyoruz! Yeni sürümün geliştirilmiş işlevselliği, video montajını hızlandıracak ve düzenleme sürecini...

VSDC 8.3 - 100+ Yeni Şablon, Anahtar Düzenleyici Penceresi, AV1 ve Geliştirilmiş GUI

VSDC 8.3 güncellemesini size sunmaktan mutluluk duyarız! Ekibimiz yeni sürüm üzerinde aktif bir şekilde çalıştı ve şimdi VSDC'de çalışmayı daha kolay hale getirecek tüm değişiklikleri...

2024'te ücretsiz video düzenleme: Bankayı Bozulmadan Yaratıcılığınızın Kilidini Açın

7 Mayıs 2024 tarihinde Tom Shinat tarafından yayınlandı Günümüzün dijital dünyasında yaratıcılık en üst düzeyde hüküm sürüyor. Bireylerin ve markaların izleyicileri büyülemesi ve...

6 iMovie Alternatives for Windows You Should Try in 2024

15 Haziran 2024 tarihinde Amy Shao tarafından yayınlandı Mac'e yönelik tüm video düzenleme araçları arasında iMovie bizim favorimizdir ve onu bu blogda birçok kez tavsiye ettik. iMovie çoğu...

6 En İyi Ücretsiz 3D Animasyon Yazılımı

3D animasyonla çalışmak, çağdaş sanatta en zorlu becerilerden biridir ve yalnızca 3D modeller hakkında bilgi sahibi olmayı değil, aynı zamanda çekim kompozisyonu, oyun motorları, render cihazları...
 

Screen Recorder Box

Bu program ile masaüstünüzün video videosunu çekebilir ve bilgisayarınıza çeşitli biçimlerde kaydedebilirsiniz. Bir video düzenleyiciyle eşleştirilmiş program, sunumlar ve demolar oluşturmak için idealdir.

Ekran Kaydedici hakkında daha bilgi edinin...


Video Capture Box

Program, dış aygıtlardan video yakalar ve ücretsiz bir biçimde bilgisayara kaydeder. Video tarayıcılardan, web kameralardan, yakalama kartlarından ve diğer araçlardan da video kaydedebilirsiniz.

Video Yakalama hakkında daha fazla bilgi edinin…


İnceleyen


"VSDC Ücretsiz Video Düzenleyici her ne kadar alışılmadık bir video düzenleyici olsa da şaşırtıcı derecede güçlü"

- PC Advisor


"Bu video düzenleyici size tonlarca kontrol ve düzenleme gücü veriyor"

- CNet


"Bu video düzenleyici tüm popüler video formatlarını destekler ve çok çeşitli özelliklere sahiptir. Aydınlatma seviyesini değiştirebilir, videoları birleştirebilir, filtreler ve geçişler uygulayabilirsiniz"

- Digital Trends