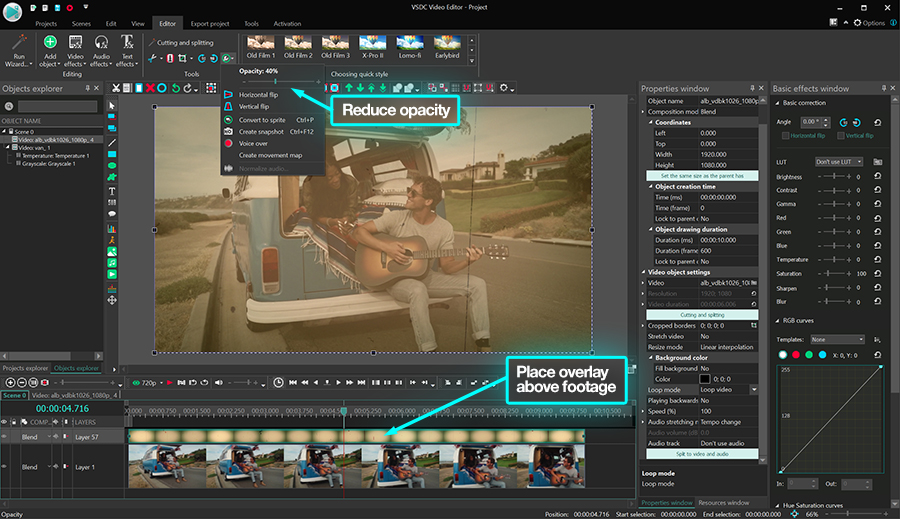
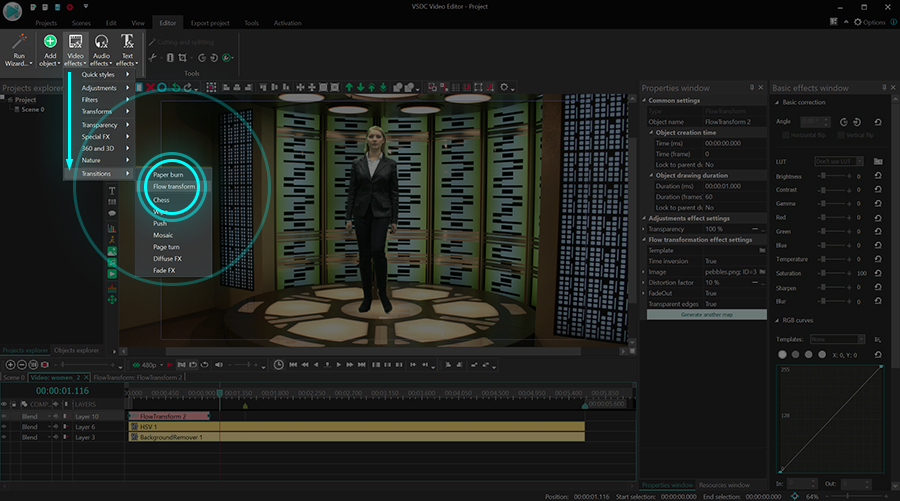
Video Editor

Use free video software to create and edit videos of any complexity from a family greeting card to a company presentation. Cut, merge video files, apply visual and audio effects, use filtration and image correction, make slideshows and add an appropriate soundtrack. Use multi-color Chroma Key and advanced parameters settings to give your video a professional look. All popular video and audio formats are supported.

Read more about Video Editor...

Video Converter

This program is intended for converting video files from one format to another. Nearly all popular video formats are supported (both reading and saving). In addition, the program drastically simplifies the task of converting videos for playback on specific multimedia devices, such as iPhone, Samsung Galaxy or Huawei P30 Pro. The program is extremely easy to use, has a modern interface and all necessary video processing functions.

Read more about Video Converter...

Audio Converter

The audio converter will help you convert audio files from one format to another. All key audio formats and codecs are supported. The program also allows you to manage playlists and meta tags, extract audio from video files and save these tracks on your computer in any format.

Read more about Audio Converter...

Audio CD Grabber

This audio tool is intended for grabbing audio tracks from compact discs and saving them to the user’s computer in any format. Nearly all popular audio formats and codecs are supported. The program can also extract track details from the FreeDB server for automatic file renaming and updating meta tags.

Read more about Audio CD Grabber...

Multifunctionality

Multifunctionality

A wide array of multimedia processing tools in one free video software suite.

High speed

High speed

Our programs use fast
and high-quality algorithms optimized for single and multi-core CPU’s.

Affordability

Affordability

VSDC video software is freely available for download to Windows OS-based PCs and laptops.

How to edit video colors in VSDC: a quick tutorial

Working with colors in a video is a huge and exciting topic. Typically, you would think of color correction either for practical reasons or for a creative calling. Sometimes you need a quick fix because the footage has been recorded with issues - poor light, gloomy day, wrong camera setup. Other times you might want to get artsy and just play with the colors, achieve a certain style or an atmosphere in your video.

There are solutions for each case. It all depends on your level of experience and the time you’re willing to invest in the process. In the tutorial below, we’ll show you how to quickly edit colors of a video using Instagram-style filters, LUTs, and standard manual color adjustments in VSDC – a free video editor for Windows OS. We’ll also teach you to change the color of an object in a video or a photo.

Download VSDC Free Video Editor

If you’re looking for more professional-level color correction techniques, check out our tutorials on working with RGB curves and Hue & Saturation color wheel.

How to edit video colors in one click: LUTs and Instagram-style filters

Let’s start with the easy part. If you have no particular color-related issues in the video and simply want to make it pop with a beautiful color combination, you’ll love quick filters available in VSDC.

Here is how to apply one-click Instagram-style filters to your video:

  1. Click on the video you want to correct.
  2. Open the Quick style menu at the top of the program interface.
  3. Click on any style to get real-time preview. Every applied style will be displayed in the menu in a light-gray frame confirming that the style has been selected.
  4. To deselect a chosen style, click on it once again. To remove all the applied styles, click on the corresponding button at the top left corner of the Quick style menu.

As you can see, there are 37 filters for you to play with including a selection of old movie styles and blurs. You can apply multiple styles to the same video and even create templates to apply the same combination to other files.

Next comes the set of LUTs. LUTs are one of those magic tools that make your poorly colored video look like a major motion picture. Technically, a LUT (look-up table) is a set of pre-selected color parameters the software will apply to your video or an image to make it look a particular way.

LUTs are widely used by videography professionals. There are 10 of them already configured and available in VSDC, plus you can find LUT packs online to download them to your computer and apply through the editor.

Here is how to find the corresponding menu:

  1. Click on the necessary video with the right mouse button.
  2. Select Video Effects --> Adjustments --> LUT.
  3. In the next tab on the timeline, you’ll find a LUT1 layer. Click on it with the right mouse button and select Properties.
  4. The Properties window will slide in from the right-hand side.
  5. Click on the LUT effect settings and select any of the available options while checking the result in the preview window.

How to change video colors by adjusting contrast, saturation, and other parameters

If you want to edit video colors manually by adjusting its brightness, temperature, contrast, and other parameters, you’re welcome to do so. Just go the Video Effects tab, scroll down to Adjustments and select the set of parameters you need to change.

Tutorial: Show Color Correction in a Beautiful Way

Say, you want to change Hue and Saturation levels. Once you select this option from the menu, you’ll notice a new tab with an HSV 1 layer on the timeline. Click the layer with the right mouse button and select Properties from the menu. The Properties window will slide in from the right-hand side. Find “HSV effect settings” and manually change the levels as it’s demonstrated in the video above.

How to change the color of an object in a video or in an image

In the last part of this tutorial, we’ll teach you to change the color of an object in a video using a tool called Gradient. Gradient allows you to make a gradual blend between various colors. Naturally, you can apply the same effect to photos as demonstrated below. Below, there is a video guide and text instructions for you to follow.

How to change image or video color with gradient tool in VSDC Free Video Editor

Step 1. Add an image or a video to the editor.

Step 2. Create a shape using the left-hand side menu and place it over the area you’re planning to edit. In this case, we use the Ellipse, but there is also a Rectangle and a “Free shape” adjustable to any form. The shape will serve as a mask and define the area color correction will be applied to.

Step 3. When you add a shape to the scene, go to the upper menu and select an ellipse style #3 - a colored one without borders.

Step 4. Make a double click on the ellipse layer and add one more ellipse to separate the area you’ll apply gradient color correction to – just like illustrated below.

Step 5. Go to the Properties window on the right and choose to paint background color black. Note: it’s the intersection of these two ellipses that will be visible in the end.

Step 6. Now go to the Blending menu on the left-hand side of the timeline and select “Inverted mask” – you’ll instantly see which area you’ll be working with.

Step 7. Go to the main scene (Tab “Scene 0”), highlight the ellipse and go to the Properties window to select Gradient from the dropdown “Fill background” menu.

Step 8. Open “Gradient settings” and select the appropriate gradient type. Try applying different colors and changing the direction of the gradient vector.

Step 9. Check different blending modes to get the result you had in mind.

Please note that the “Inverted mask” tool is only available in VSDC Pro version that is $19.99 per year. The rest of the video color changing tools and filters described in this tutorial are available for free.


You can get more information about the program on Free Video Editor' description page.

How to stabilize a video in VSDC Video Editor

Footage stabilization is one of the most popular features in video editing. It is demanded by various audiences: from extreme sports adepts literally glued to their action cameras - to sentimental mothers with their hands shaking during the filming of their daughters’ wedding ceremonies. Whatever the case is, the outcome is often the same – a jittering video spoiling the overall impression and impossible to refilm at the same time.

Modern problems require modern solutions, right? One of the easiest ways to smoothen your unstable footage is to download VSDC Video Editor that comes with an embedded video stabilizer tool for your purposes. Here is a brief video tutorial on how to use this tool.

Please note: the tool is not available in the free version of the software. You will need to get a PRO version to use this feature. It’s only $19.99 per year though.


How to use a video stabilizer in VSDC

A step-by-step process for footage stabilization is as follows:

  1. Open VSDC Video Editor.
  2. Proceed to the top menu and select the “Tools” tab.
  3. Click “Video Stabilization” tool at the top left corner of the screen. A new window will open.
  4. Select the “Open files” option and choose unstable footage from your computer.
  5. Proceed to the “Stabilization” tab. Select the settings suitable for your purposes:
    • Shakiness

      Shakiness correction is the most vital setting in our review. We suggest choosing its value depending on how shaky your video is on a scale from 1 to 10. The “shakier” the video, the bigger the value.

    • Smoothing

      Smoothing is a feature that allows you to choose the number of frames VSDC is going to use for correction effects. Going for bigger value here would be especially suitable for videos where the operator was moving around. With many frames to work with VSDC will better disguise the operator’s movement.

      Note: hover over other settings in the “Stabilization” tab to see their brief descriptions.

  6. Proceed to the “formats” tab. Here you can select a specific format for the output video. If you are not sure about the format, you can always refer to the social media channel the video is intended for. VSDC has predefined settings for output videos that include YouTube, Instagram, and Facebook.
  7. If you want to cut your video, go to the “Editor” tab. Click the timeline exactly where you want to start making the cut. Press the “Start selection” box above for VSDC to memorize the start of the cut. Then click the timeline at the end of the desired cut-out fragment. Press the “End selection” box above and then click the “Cut region” box. Proceed to the bottom right corner of the screen to the “Apply changes” button that will save your edits and take you back to the Video Stabilization window. Please note that within the Video Stabilization tool you will not be able to preview the changes that you made. They will only be available in the output file.
  8. Choose the output file name and destination at the bottom of the window.
  9. Go to the “Profile” section below to select the quality of the output format. Opt for lower quality only if you are looking for faster conversion and lower output file size.
  10. Complete the process by clicking the “Export Project” button in the “Stabilization” tab. Check out the final result.

How to stabilize a shaky video in VSDC in a couple of clicks


That’s it! You have just turned your shaky footage into a stable clip. If you are interested in more advanced features of the editor, feel free to sift through our how-to section that covers the basics of video editing for amateurs from cutting and rotating a video to creating stunning cinemagraphs.


You can get more information about the program on Free Video Editor' description page.

Apply professional-level color correction with Hue & Saturation curves

Have you ever noticed that the same picture may look absolutely differently if processed in opposite colors? The same is true for videos: cool colors are often used to create an atmosphere of anxiety, meanwhile, warm colors are good for creating the spirit of joy, comfort, and romance. Both – photographers and videographers use this approach to transmit the desired emotion to the viewers.

From a technical standpoint, you can achieve these effects by shifting the color balance of a picture, and in this article, we’ll show you exactly how to do that using VSDC Free Video Editor.

Being able to correct color balance through working with Hue and Saturation parameters will come in handy for any video editing enthusiast, not just professionals. In fact, that’s sometimes the only way to “save” a video recorded with wrong white balance settings, make a photo more vivid, or create a popular effect through desaturating one or several colors in the picture.

Below, we’ll show you what a Hue&Saturation color wheel is, and how to use it. If you’re interested in exploring other video color correction techniques, we also suggest you check our guide on working with RGB curves to balance out the brightness and contrast of your picture.

Before you start, make sure to download and install VSDC Free Video Editor to your PC.

How to open the Hue & Saturation color wheel in VSDC

Once you’ve installed and launched the program, import the file you’re planning to work on. It can be an image or a video. Then click on the file and go to the View tab in the top menu. Choose the Basic effects icon – that will open the Basic effects window on the right-hand side of the editor. Scroll down a bit and you’ll see the “Hue and Saturation curves” dropdown menu. That’s exactly where you’ll find the right color wheel.

How to work with the Hue and Saturation curves - the basic principles

The idea behind working with the color wheel is based on creating control points on the inner circle of the wheel (it’s a white circle illustrated below) and moving them closer to the wheel edge or to its center.

Hue Saturation curves

To create a control point, you need to make a double-click in the color area you’re planning to work with. In other words, if you’re planning to correct red tones in the picture, you’ll need to make a double-click on the inner (white) circle exactly where red tones are located. This will be your control point, and by dragging it closer to the center or the edge you’ll be increasing or decreasing saturation of the chosen color. Note, the edge of the specter correlates with maximum contrast, and its center – the opposite.

Areas of maximum and minimum contrast

If you move a control point around the circle, you’ll change the tones selected for correction. In other words, by moving a control point from one color sector to another, you change the tones that will be balanced but you’re not switching the colors in the video.

Changing tones of one color on the inner circle

You can change the position of control points by:

  • dragging them manually using the mouse
  • using your keyboard arrows

You might want to correct a specific color tone in the video without changing the rest of the tones. In this case, you’ll need to create three control points: one in the center of the color sector, and two more to the left and to the right from it. These additional points will separate the color area you’ll be working with on the wheel – see the illustration below.

Setting main three control points

Note that in the upper side of the color wheel menu, there is a 6 color palette. Those are the main colors of the wheel: red, yellow, green, blue, dark blue, and purple. If you’re planning to correct any of these color tones in the video, click on it and you’ll get the three control point set automatically – just like illustrated below.

Main colors of the color wheel

If there is a specific color in the video you’d like to correct and you can’t find it on the wheel, use the eyedropper tool. It’s located in the top right corner of the Hue and Saturation dialog window. Click the eyedropper icon and place the mouse over the color you’d like to correct. Click on the color, and it will be precisely chosen on the wheel by the three-point set.

The eyedropper tool

In case after all the color correction manipulations you decide that the original picture looked better, just click the Undo icon in the top right corner of the dialog window. All the control point movements will be canceled and you’ll get the original video back.

The reset to default button

How to correct video colors with the Hue and Saturation curves: examples

Let’s do some practice, shall we? To give you a better idea of how the Hue and Saturation curves work, we’ll show you few common manipulations applied to an image. In the illustration below, you see a photo we’ve uploaded to VSDC and the HS dialog window with the color wheel.

Hue Saturation color wheel

Imagine you need to correct red tones in this photo. To do that, we’ll create a control point in the red tones sector on the wheel. We’ll place two more points to separate the red tone area in the specter because we aren’t planning to change the rest of the tones in the photo.

Select red tones for correction

To make the red tones more saturated, we’ll need to drag the main control point closer to the edge of the color wheel – as illustrated below.

Make the red tones more saturated

To lower saturation level of the red tones, you need to move the main control point closer to the center of the specter – as illustrated below.

Lower saturation level of the red tones

If you want to completely desaturate the chosen color in the image or a video, you need to move the control point to the innermost position, as illustrated below.

Make the color desaturated

Finally, if you’d like to achieve the popular effect when the entire video is black and white with only one color saturated, you can do it too. Just leave the control point in the chosen color sector unchanged, while dragging the two side control points to the innermost position. The trick Is illustrated below, and the only saturated color in the photo is obviously red.

Black and white image with only one color saturated

Working with the Hue and Saturation curves is much easier than it may seem at first sight. Even if you've never performed video color correction, you’ll be able to significantly enhance any photo or video if you just get used to the principle of control point movements.

Work with Lift, Gamma & Gain color wheels

Feel free to message us on Facebook and subscribe to our YouTube channel to stay tuned with new tutorials.


You can get more information about the program on Free Video Editor' description page.

How to make a voice over video in VSDC

In the era of YouTube, when online blogging and production of video tutorials on just about anything has become commonplace, it’s vital for aspiring clip makers to master the skill of voice over video. Even if you are not planning to become a YouTuber, you become well aware of those cases when you see that your vacation footage was ruined by chattering crowds, wind gusts, etc. One way to resolve the problem is to replace the defective sound with a nice tune. But what if you want to bring a more personal touch and record your own voice while impressions are still fresh and lively?

Download VSDC Free Video editor that allows you to do so in two ways: an easy one and a free one. Below, we’ll review both, guide you through the main steps, and explain the difference between the two.

How to do voice over video in VSDC: the easy way

VSDC has an intuitive built-in voiceover tool that allows you to quickly add audio comments to your videos without having to deal with complex settings of any kind. See it for yourself in the video guide below.

Here is what you have to do in a nutshell:

  1. Import your video to the timeline using the “Add Object” dropdown menu.
  2. Click the wrench icon to select the voiceover tool.
  3. Play-pause the video to choose the part that needs audio comments. Use the “Start Recording” button whenever a voice comment needs to be added. Use the “Stop Recording” button to end the recording. Record as many items as necessary. Note: the recording will only start when you hit the play button. When the video is paused – your voice won’t be recorded.

    How to create a voiceover video in VSDC - fast and eaasy

  4. When you are done with your comments, close the voiceover tool window. A pop-up window will appear asking for confirmation to add recorded files to the timeline. Click “Yes”.
  5. Your audio comments will automatically be added to the timeline exactly where you wanted them to be. No manual action needed.
  6. If you want to mute original video soundtrack, right-click your video on a timeline and go to “Audio Effects --> Amplitude --> Silence”.
  7. Double-check the result by clicking the red play button right under the preview window. If everything is fine, complete the process by clicking the red “Export project” button on the same title tab.

Please note, that the voiceover tool is only available with the PRO version of VSDC editor which is offered for $19.99 per year. If you are looking for a free way to record your voice over a video, follow the instructions below.


How to create a voiceover video in VSDC: the free way

VSDC wouldn’t be called a free editor unless it offered a free way to record voice over video. Here is a detailed instruction:

  1. Open VSDC Free Video Editor and click “Import Content” to import the video that you intend to give voice to.
  2. Proceed to the “Tools” tab at the top menu and select the “Voice Recorder” tool. A new window will open.

    Adding voice over video for free in VSDC Video Editor

  3. Choose the desired format of your voice recording in the “Formats” tab.
  4. Proceed to the lower sections of the menu to select the output file destination, its quality, and the device you will use for recording.
  5. Place a checkmark in the “split file” section, if you are working with a really long video. This way your output audio will be split into several recordings. It will come in handy during the matching of your recording with the video. Mistiming can’t be fixed with a single audio file in place, so having multiple files will help you perfectly adjust your sound and video tracks.
  6. Select the duration of your audio chunks in the drop-down menu on the right depending on the length of your video.
  7. Press the “Start Recording” button at the top right corner of the screen. Launching your video in a separate window might be a good idea too. You want to know what you are commenting, right? Press “Stop Recording” when you are ready and close the “Voice Recorder” window.
  8. Go back to VSDC video editing window with your imported video. Right-click your video on a timeline and go to “Audio Effects --> Amplitude --> Silence”. This will silence the original soundtrack of your video.

    How to silence the original audio track in VSDC

  9. Go to the “Editor” tab, select “Add Object” and choose “Audio” from the drop-down list. Now proceed to the location on your computer where you saved you recordings, import them to the timeline and use drag-and-drop motion to place them in line with the video segments they are intended for.
  10. Double-check the result by clicking the red play button right under the preview window. If everything is fine, complete the process by clicking the red “Export project” button in the same title tab.

Wrap-up

As you have probably noticed, both methods lead to the same result: your recorded audio files placed beside your video on a timeline in the correct sequence. The only difference is, with a free method, you have to manually record, import and position them. With an easy method, manual work is taken out of the equation, making voice over videos much faster. Which one is better? You tell us :-)

How to create a slideshow from photos in VSDC Free Video Editor

Assembling media content in a slideshow is a great way to share your experiences with friends and family. However, finding the right tool to do so may be challenging. PowerPoint seems to be one of the easiest options but has a limited set of features and won’t let you work with video files for instance. On the contrary, some video editing software may offer a rich toolset, but would also require its users to dip into the unwanted complexities of multilayer editing.

If you are looking for a sweet spot, download VSDC Free Video Editor with its powerful slideshow wizard. It has a comprehensive set of features packed into an intuitive interface anyone can master in seconds. Sounds too good to be true? See for yourself in this one-minute video guide on how to create a slideshow with VSDC.

Want to get into more detail? Proceed to the step-by-step guide on how to make a video from pictures below.

Step 1. Access the wizard

Upon downloading and installing VSDC, open it and click the “Create Slideshow” button available in the “Start Project Now” section. A new window will pop up. Here you can name your project and choose its parameters like height, width and resolution. Click “Finish” to save selected settings. You will be taken to the “Files sequence wizard” in a separate window.

VSDC Free Video Editor start screen

Step 2. Select the artifacts

In order to import the content for your slideshow, proceed to the green “Add files” button and select the desired media files. Alternatively, you can follow the recommendations of the “Drag and drop media files here” box. After adding the files to the timeline, you can manipulate their placement with the same drag and drop method to make sure you got the right sequence.

Step 3. Apply magic

You’ve probably noticed that your media content is placed in rectangular boxes while the round sections in between with arrows inside remain intact. That’s because they are intended for your transitions – you’ll need them to create an actual video from your pictures. To start, proceed to the top left corner of the window. Here you will find the list of available transition types. Specific transitions of a certain type are located in the middle section. The preview window on the right-hand side allows you to check out the way various transition effects work. Drag and drop preferred transitions from the middle section right to the encircled arrows between your pictures.

Create a video from pictures in VSDC slideshow wizard

Step 4. Add a touch of enchantment

Don’t like the duration of a particular picture? Click the picture on the timeline and go to the “Duration” box above. Set the desired value and click “Enter”. Please note that the values in this box are expressed in 1/1000th of a second. So, in order to make your image last for a second, enter 1000. The same rule is applicable for your transitions too. Also, pay attention to the toolbox on the right from the “duration” section. Here you can cut, crop, rotate your images and apply filters to them, if necessary.

Step 5. Save your charming work

Click “Apply settings” in the bottom right corner of the window to save your slideshow efforts. The wizard window will close. You can always come back to the wizard by clicking the “properties window” on the right side of the screen and selecting the “Edit by using the wizard” button.

Now it’s time to export your project. Proceed to the “Export project” tab in the top menu. Select the format and the location on your desktop where you want to place the slideshow. Complete the process by clicking the red “Export project” button in the same title tab.

How to make a slideshow out of photos

Recap time: how to make a video from pictures

Please use the screenshot above as a reference guide. It indicates all the working areas that we have covered in this tutorial. Good luck with creating slideshows!


You can get more information about the program on Free Video Editor' description page.

News

VSDC 9.3: 150+ Templates, Text Transformer, Sprite Auto-Detect and GUI Update

Change is all about improvement, and this process wouldn't be possible without your input. After carefully reviewing your feedback, we’ve addressed several key issues and introduced updates designed...

Best Special Effects Software

Intro In 2024 the options range for creating visual effects is incredibly diverse and it becomes more and more challenging to identify the top choices. Here you can find a guide to the top visual FX...

VSDC 9.2: AI Segmentation Models, 300+ Transitions, VSDC Cloud and New Templates Pack

Are you ready to explore new heights with the latest major VSDC update? Finally, Version 9.2 is here! Packed with groundbreaking features, including the new AI-powered Segmentation tool, this update offers...

How Black and White Movies Were Colorized

Are you a fan of classic black and white films? Ever been curious about how they would appear if they were in color? Many filmmakers have pondered the same, leading to numerous classic movies being colorized....

The Best Online Video Editors in 2024: Benefits and Drawbacks

July 15, 2024 published by Amy Shao In today’s digital landscape, the popularity of video content is gaining momentum, with users increasingly turning to video creation both for personal advantage and...

New Transition Addition Methods, RAW/BRAW Files Support and Free Waveform

Welcome to the next level of video editing with VSDC's latest release, Version 9.1! Packed with an array of fresh features and enhancements, this update is designed to make your video editing experience...

VSDC 8.3 – 100+ New Templates, Key Editor Window, AV1 and Enhanced GUI

Welcome to the latest VSDC update, Version 8.3! We've been working hard and we’re ready to present a feature-packed release for you to discover an exciting array of over 100 fresh free video templates,...

Free video editing in 2024: Unlock Your Creativity without Breaking the Bank

May 7, 2024 published by Tom Shinat In today's digital world creativity reigns supreme. It offers endless possibilities for individuals and brands to captivate audiences and leave a lasting impression....

6 iMovie Alternatives for Windows You Should Try in 2024

June 15, 2024 published by Amy Shao Of all video editing tools for Mac, iMovie is our favorite one, and we’ve recommended it many times on this blog. iMovie comes pre-installed on most Apple devices;...

6 Best Free 3D Animation Software

Working with 3D animation is one of the most demanding skills in contemporary art, requiring not only knowledge about 3D models but also a deep understanding of shot composition, game engines, renderers,...
 

Screen Recorder Box

This program allows you to capture the video of your desktop and save it on your PC in various formats. Coupled with a video editor, the program is a great tool for creating presentations, tutorials and demo videos.

Read more about Screen Recorder...


Video Capture Box

The program captures video from external devices and records it to computer in a free format. You can save video from video tuners, webcams, capture cards and other gadgets.

Read more about Video Capture...


Reviewed by


"VSDC Free Video Editor is a surprisingly powerful, if unconventional video editor"

- PC Advisor


"This video editor gives you tons of control and editing power"

- CNet


"The editor handles many common formats and boasts a good deal of capabilities when it comes time to alter lighting, splice video, and apply filters and transitions in post production"

- Digital Trends