Video Düzenleyici

Aile tebrik kartından şirket sunumuna kadar her türlü karmaşıklıkta videolar oluşturmak ve düzenlemek için ücretsiz video yazılımını kullanın. Video dosyalarını kesin, birleştirin, görsel ve ses efektleri uygulayın, filtreleme ve görüntü düzeltme kullanın, slayt gösterileri yapın ve uygun bir film müziği ekleyin. Videonuza profesyonel bir görünüm kazandırmak için çok renkli Renk anahtarı ve gelişmiş parametre ayarlarını kullanın. Tüm popüler video ve ses formatları desteklenir.

Video Düzenleyici hakkında daha fazla bilgi edinin...

Video Dönüştürücü

Bu program video dosyalarını bir biçimden diğerine dönüştürmek için tasarlanmıştır. Hemen hemen tüm popüler video biçimleri (hem okuma hem de kaydetme) desteklenir. Ayrıca iPhone, Huawei P30 Pro veya Samsung Galaxy gibi belirli multimedya cihazları için videolar oluşturmak da mümkündür. Programın kullanımı son derece kolaydır, modern bir arayüze ve gerekli tüm video işleme fonksiyonlarına sahiptir.

Video Dönüştürücü hakkında daha fazla bilgi edinin...

Ses Dönüştürücü

Bir ses dönüştürücü kullanarak ses dosyalarını bir biçimden diğerine dönüştürebilirsiniz. Tüm önemli ses biçimleri ve codec bileşenleri desteklenir. Program ayrıca çalma listelerini ve meta etiketlerini yönetmenize izin verir, ayrıca video dosyalarından sesi dışa aktarmak ve parçaları herhangi bir biçimde bilgisayarınıza kaydetmeniz de mümkündür.

Ses Dönüştürücü hakkında daha fazla bilgi edinin...

Ses CD’si Yakalayıcı

Bu ses aracı kompakt disklerden ses parçalarını kopyalamaz ve bunları seçtiğiniz herhangi bir biçimde bilgisayarınıza kaydetmek için tasarlanmıştır. Neredeyse tüm popüler ses biçimleri ve codec bileşenleri desteklenir. Program ayrıca dosyaları otomatik olarak yeniden adlandırma ve meta etiketleri güncelleme için parça ayrıntılarını FreeDB sunucusundan ayıklayabilir.

Ses CD’si Yakalayıcı hakkında daha fazla bilgi edinin...

Çok işlevsellik

Çok işlevsellik

Tek bir ücretsiz video yazılım paketinde çok çeşitli multimedya işleme araçları

Yüksek hız

Yüksek hız

Programlar hızlı, optimize edilmiş çok işlemcili algoritmalar kullanır.

Kullanılabilirlik

Kullanılabilirlik

VSDC video yazılımı, Windows işletim sistemi tabanlı tüm bilgisayarlarda ve cihazlarda ücretsiz olarak indirilebilir.

YouTube Video Editor is gone. Discover alternative video editors for YouTube creators

Top Free Video Editors for Windows 10

If you've been around for the past year and a half, you probably remember YouTube video editor and its power of simplicity. Beginning video bloggers loved it. Nothing could beat the convenience of editing YouTube videos right there... on YouTube. Avoiding the hassle of switching between your browser and the desktop, downloading, converting, processing, saving, and uploading videos again felt great. Yet, starting September 2017 YouTube Video Editor has been gone. So let's take another moment of appreciation and move on to the solutions you can use to edit your clips instead. After all, you were looking for one, weren't you?

In this article, you'll find three pieces of software to help you handle the process of post-production and take your channel game to the next level.

Now, you're probably wondering why there are three products. Truth be told, even professional YouTubers barely stick to one product, so why should you? Some apps are just unparalleled at one particular feature, so you may want to use a couple of them to achieve better results.

VSDC - Free and Powerful Alternative to YouTube Video Editor for Windows (Download)

VSDC Free Video Editor Interface overview

VSDC interface is slightly more tricky than the original YouTube video editor was. Yet, it offers a much wider feature-set, hence recognized by the community of technology enthusiasts.

Used by: a Drone Expert YouTuber Quadcopter 101.

Recommended by: GoPro official community, gamer YouTubers, Techradar blog.

Received honorable mentions from a video editing expert Justin Brown at Primal video, VidProMom, and Steven Van.

Visit VSDC official page

What makes VSDC a great video editor for YouTube creators

First, it's non-linear. That means you'll be able to easily apply popular effects like picture-in-picture, news-style, split screen, gradual zoom, video-in-text, and many others. There is a decent text editor, so you'll be able to add contour titles and comments to a scene when needed.

Second, it's absolutely free. There is a Pro version you might want to consider to speed up video exporting (it's a $19 annual subscription). It activates hardware acceleration using more additional PC resources, therefore the program might double the rendering rate. Other than that, VSDC free version should be more than sufficient for you.

Third, you can upload videos to YouTube directly from the video editor interface, once you finish the process of montage. And it's a great time-saver, given that otherwise, you would have to export and save the file to your PC first and then publish it online.

VSDC Free Video Editor Interface overview

If you're into creating reaction videos or tutorials, VSDC might also be a convenient choice for you because of the built-in screen capture and video recorder. You won't have to employ 3-rd party software to fulfill these tasks anymore. Finally, there is a mighty Chroma Key tool available, so if you're shooting with a green screen, you'll be able to easily remove it from the footage using VSDC Video Editor as well.

On top of that, there are over 200 video tutorials about working with this software uploaded to the official company channel on YouTube. So, if you're ready to invest a bit of time into getting familiar with the interface and some basic combinations, using VSDC as a primary video editor for YouTube clips will be a no-brainer.

For example, look how it takes less than a minute to create a beautiful video in text effect that will be an ideal intro for just about any channel. No video editing experience or special knowledge required.

Enhancements feature - consider using what's left after YouTube Video Editor

Although YouTube Video Editor is no longer available, you can still perform a decent number of basic but essential operations in the Creator Studio. Perhaps, it's not the ultimate solution for those having complicated project ideas in mind, but the Enhancements feature does a great job when you quickly need to polish a video, cut out a fragment or add an audio track to the video record.

In fact, among the list of not-so-uncommon filters, color correction tools, and speed settings, YouTube has few tools you won't find in other free video editors. They are: shaky camera motions stabilizer - great for videos recorded on the go without professional equipment, face blurring, and custom blurring - typically performed by means of masking tools in other video editing software. The latter is often used for confidentiality purposes rather than creative goals. You may consider blurring faces, numbers, names, brands, dates, GPS coordinates, car plates - what have you.

If needed, you can download your previously uploaded videos from YouTube in a 720p resolution and even retrieve the original files using Google Takeout.

VSDC Free Video Editor Interface overview

While this is certainly not an ideal tool for an aspiring video vlogger, it's beneficial for you to know that there is no need to pay for 3rd-party editors if all you want is to fix a shaky footage or to blur a face of someone who wasn't supposed to be caught on camera.

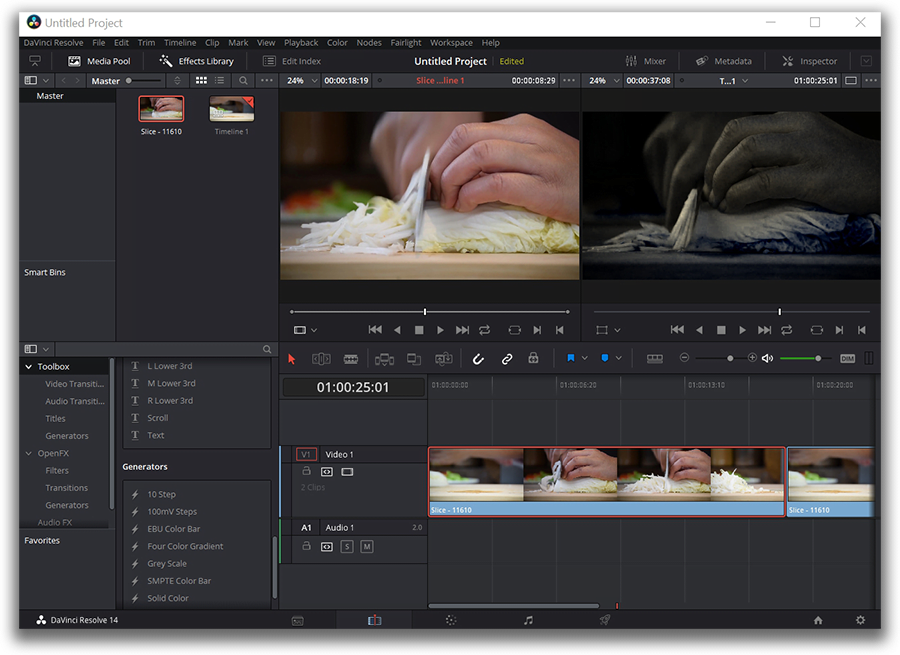
Davinci Resolve - professional color grading video editor for YouTube

This desktop tool is a powerhouse of color correction, and we won't even try to compare it to what YouTube Video Editor used to be, because Resolve represents an entirely different level of post-production.

Recommended by: indie filmmakers, color grading enthusiasts.

Davinci Resolve might be a good choice for those having a more serious approach to video editing - say, this is something you're planning to do for a living, and it's a professional solution you're looking for, not just a cutter and a splicer. Think of it as of Photoshop for videos rather than an average editor. You'll be able to achieve some breathtaking results, but you should have some understanding of color grades and be passionate about it enough to invest time and effort into this software.

Certainly, there will be a steep learning curve even for those with experience because the program interface appears somewhat overwhelming. Luckily, there are dozens of tutorials and even online courses available for those willing to master Davinci Resolve. Before jumping to installation, you should also understand that if you choose such a powerful tool as Resolve, your machine needs to comply with its requirements. The absolute bare minimum is 8GB of system RAM, at least 4GB of graphics RAM and enough storage space. Note, that the installation file alone weighs 780MB.

VSDC Free Video Editor Interface overview

You can download the free version of Davinci Resolve from the official website of Blackmagic Design - the developer company.

What makes Davinci Resolve a good YouTube video editor

Although we started complimenting Davinci Resolve for its color grading tools, it actually has the set of basic features as well. Thus, you'll be able to cut, split, trim, and merge video files, work with audio, use Chroma Key (remove green screen from your footage), add titles, create transitions, apply speed effects, composite a split screen effect, and much much more.

When it comes to trimming, Resolve is incomparably convenient because of the real-time timeline zooming feature (for a more precise cut) and a number of hotkey combinations you can use when applying repetitive actions. At the export level, just like VSDC, Davinci Resolve allows you to avoid extra steps and upload your project directly to YouTube (or Vimeo) in 1080p.

On top of that, Resolve is a crossplatform solution, which means it works on Windows, Mac, and Linux as well.

iMovie - probably the most overlooked free video editor for YouTube (Mac)

If you think you must use a fancy expensive piece of video editing software to stand out on YouTube, you're wrong. What really matters is your content quality, determination, and creativity, of course. So, if you're on Mac, your first best choice should be iMovie. In fact, according to the Influencer Equipment database, even after becoming well-known, some YouTubers still use this absolutely free default video editor by Apple. Tana Mongeau, Zane Hijazi, Trisha Paytas, and Brawadis are some of the most famous iMovie advocates.

Recommended by: vloggers

Shotcut video editor interface

What makes iMovie a great choice

First, it's pre-installed on every new Mac, and even those having old Apple computers can install iMovie for free from the App Store (it used to be impossible previously). Second, it has a minimalistic intuitive interface and most operations are performed via a simple drag-n-drop motion. Third, known for meticulous attention to details and the visual components, Apple video editing software developers have embedded a library of themes and title templates. It comes in especially handy if you're working on a series of videos and willing to apply the same style to every episode.

And because Apple products create such a unified ecosystem, you can benefit from it in many ways too. For example, you can add pre-uploaded royalty-free audio tracks to your movie as well as quickly import songs from your iTunes and anything you have in your iCloud.

Finally, iMovie allows you to remove green and blue screens from your footage easily by the same old drag-n-drop movement where you just overlay the green/blue screen video on the video or image that is supposed to replace the background. Overall, there are more than 200 different effects available in this editor including the popular picture-in-picture, slow motion, fast-forward, fade transitions, zoom, freeze frames, and many others.

Afterword. Why you should consider free video editors for YouTube instead of paid solutions

You may be wondering what most YouTubers use. Truth be told, among the established creators working on their channels full-time, the most frequently mentioned video editing software is Adobe Premiere (cross-platform program, starts at $19.99/mo - if annual subscription purchased). Then comes Final Cut Pro (Mac only, $299) and Sony Vegas (Windows only, starts at $400).

Yet, is there any correlation between video editing software and their achievements? We seriously doubt that. Moreover, if you're following some popular channels, you probably know that quite a few started their blogging career as a hobby using the most primitive free video editors. In fact, it appears that many still use freeware for their channels, and that's noteworthy.

There's no need to break your piggy bank to purchase a video editor for your brand new YouTube channel. Experienced creators often say that it's always wise to focus your effort on the production versus thinking that post-production can turn a poor quality footage into a masterpiece. So if you're willing to invest, consider upgrading your hardware instead. A decent source of light and a microphone are already half a battle, as you probably won't have to sweat the color balance and the audio settings afterward.

What makes a good YouTube video editor anyway?

Great question. It really comes down to your skills and needs. For instance, if you're planning to publish game walkthroughs, obviously, you might need a built-in screen recorder. If reaction videos are your thing, look for an embedded video capture tool. If you are a person typically making a dozen of shots before merging them into one episode, you should certainly make sure the trimming tool is intuitive. Finally, download a free green screen sample stock video and quickly test the Chroma Key tool if this is what you're planning to use in the future.

Here is a checklist you may refer to when choosing a video editor for a YouTube channel:

  • It should be a non-linear tool.
  • It should comply with your PC or Mac resources and run stably. Check software system requirements before installing it to avoid unexpected crashes.
  • It should allow you to export videos in 1080p (720p will do most of the times too, though, but 1080p is definitely a better option), ideally using H.265 codec because it will keep the highest quality with a minimum file size.

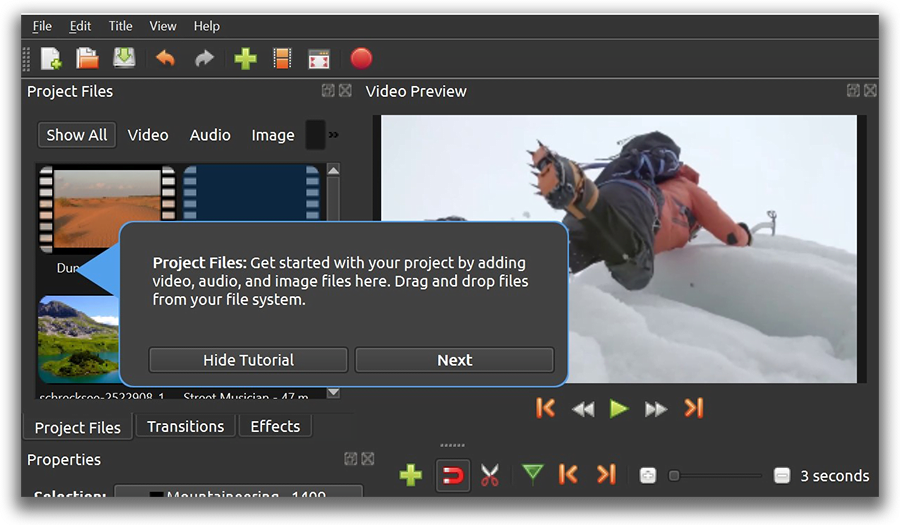
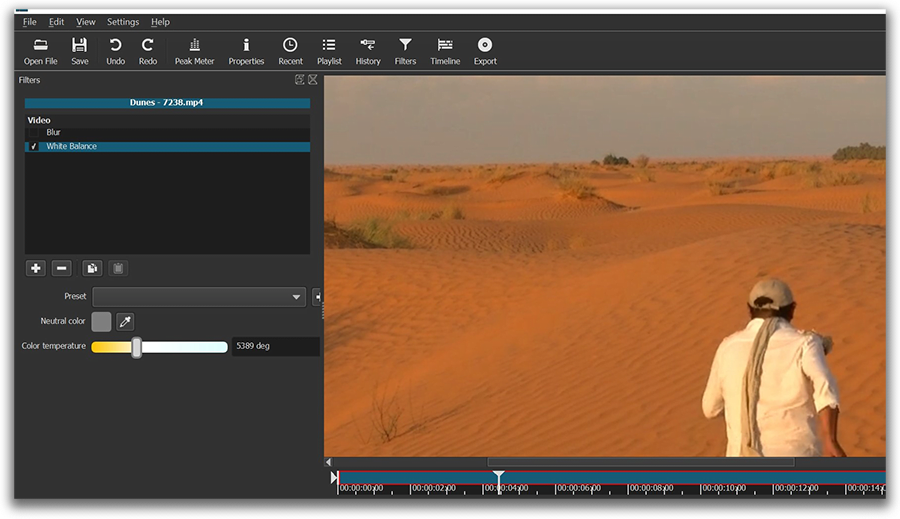
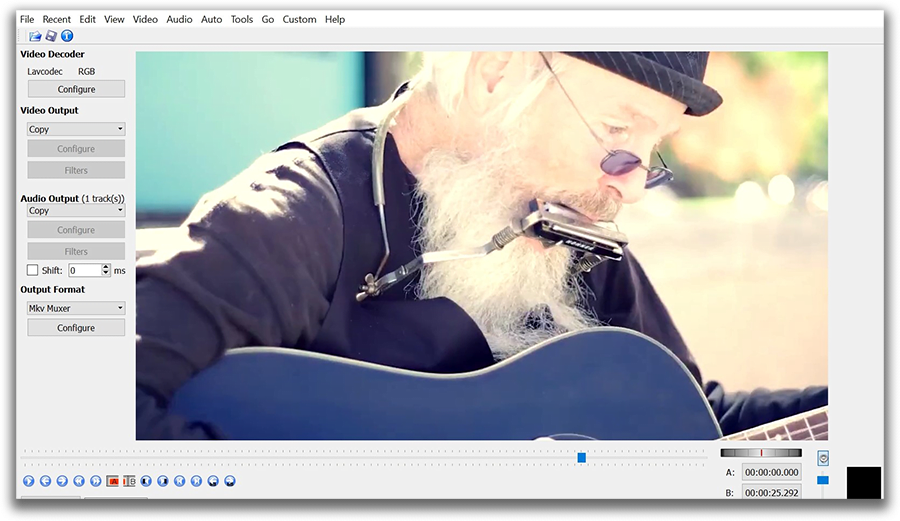
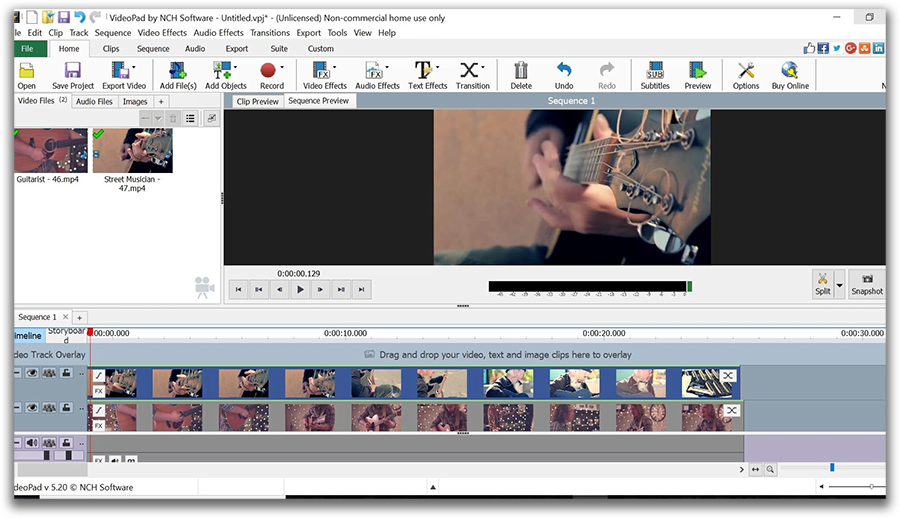
Let's recap the above said. While there are dozens of free video editors on the Internet, many of them won't make a good choice if you're looking for a YouTube video editor. Some are too primitive and lack crucial features - such as direct YouTube uploader, high resolution export, green screen, and text objects. Others put restrictions on the exported projects, such as a limited choice of format or a watermark. We believe, the editors reviewed in this article are great examples of a rich feature-set available at zero cost with no restrictions whatsoever. Hopefully, the list has been of use. If it hasn't, however, here are few more tools you may check out: ShotCut, Openshot, Videopad, and Hitfilm Express.

For those interested, here is a detailed review of free Windows 10 video editors.

Don't forget to share this article if you've found it helpful, and best of luck.

Looking for a Windows 10 Video Editor? Check out the list of 7 programs available for free

Top Free Video Editors for Windows 10

So, you just bought a new PC or probably upgraded your current one to Windows 10 (it was about time!). And now you’re probably looking for a video editor because Microsoft stopped supporting Movie Maker at the beginning of 2017. Rest assured you're not alone in your search - and welcome to the club of thousands of Windows 10 users worldwide.

Since the moment Windows Essentials suite reached its end of support, we've been relentlessly testing various programs to find the ones we could recommend as Movie Maker alternatives. Today we've got you covered with 7 excellent pieces of software for video editing. Whether you have some experience in clip making or this will be your first masterpiece, you'll certainly find the right solution here.

Oh, did we mention that all the programs on the list are free? Well, consider it a nice bonus.

VSDC - Free Windows 10 video editor of our choice (Download)

If you're searching for a multifunctional solution including a video editor, a slideshow creator, and a screen recorder, look no further. VSDC has it all. Named among the best free video editing software for PC by the GoPro technical support team, TechRadar online magazine, and numerous Youtuber channels, VSDC deserves to hold the top spot of this list.

VSDC Free Video Editor Interface overview

Let's take a closer look at what the program offers.

VSDC has a wide array of tools for multiple purposes. It will come in handy if you're just planning to give your video a quick touch-up - say, cutting it, adding a soundtrack, fixing the angle, changing the light & color balance - you name it! Yet, it will also cope with a serious project requiring more advanced features.

There are over 30 color filters including Instagram-style presets. You're capable of cropping the original picture borders or zooming the required part gradually. Here are some other popular effects you might be interested in checking out:

What else is good: VSDC works surprisingly well even on computers with limited resources. In other words, you'll be able to utilize VSDC even if your PC has as little as 2Gb memory left. This capability makes it a good Windows 10 video editor choice even for low-end machine owners.

Format-wise, VSDC will open any file, no matter which device was used to record the footage. It works with 4K resolution too. At the export level, you'll be able to choose pre-configured profiles for further upload to social networks (YouTube, Facebook, Instagram, Twitter) or manually set the format, resolution, and quality including HD.

VSDC Free Video Editor cropping tool

Download the latest version of VSDC

OpenShot - Windows 10 video editor which is open-source

Openshot interface looks much more minimalistic, so does its set of tools. This software, however, gets the job done pretty fast due to the most actions being implemented through a drag'n'drop mouse movement. If you were a fan of that feature in Movie Maker, you'd probably be happy to see the similarity. Unlike Movie Maker though, OpenShot is a non-linear video editor, which instantly makes it twice as powerful.

By the way, first-time users might be also pleasantly surprised by the popping up tutorial windows walking you through the main steps and helping get familiar with the interface.

Openshot video editor help pop-ups

Openshot has an impressive list of over 300 transitions. Each one can be applied to the required part or the intersection of two media files by the drag'n'drop movement as well. You also get to play with some essential effects, such as blurring, brightness&contrast, Chroma Key, deinterlacing, wipe transitions, negative, and color saturation. The picture-in-picture effect is a bit indirect, but there is a way to perform it by right-mouse clicking on the file and choosing a 1/4 size layout. Right-mouse click will also open the menu for time-related effects: freezing, fast-forwarding, slow-motion, etc.

What else is good: being able to apply actions "in bulk" - for example, copying the effects from a chosen area, or separating audio from a single clip or multiple clips simultaneously.

Where to get it: you can download the 64-bit Windows installer here.

Shotcut - a decent Windows 10 video editor for Chroma keying

There are not so many semi-professional open source video editors out there - Shotcut is one of them. It is available for Windows, MacOS, and Linux users. With its minimalistic interface, Shotcut is capable of all the essential video editing operations, including such challenging ones as film restoration, footage stabilization, and white balancing.

Applying effects is even more convenient because of the real-time preview you get from the left-side filters menu. Simply choose the filters you'd like to try on the footage and go through the checkboxes to see how they look on the picture in the right-side preview window.

Shotcut video editor interface

What makes Shotcut stand out as a video editor for Windows 10 though, is the Chroma Keying tool. Movie Maker didn't have the feature-set for removing a green background from videos and images - you could only perform the operation through a 3rd-party plugin (quite a painful sequence of actions). Shotcut in its turn allows for applying this advanced effect quickly and easily. Perhaps, that's the reason TechRadar has named it among the software to replace Windows Essentials suite components.

What else is good: the ability to quickly reverse your actions in a non-linear order. As mentioned before, each filter or effect you apply to the footage is eventually listed in the left-side window with a marked checkbox. That means you can uncheck any box at any time without having to start the editing process all over again.

Where to get it: Shotcut official website.

Avidemux - ultra-simplistic Windows 10 video editor and encoder

If the previously mentioned software overwhelmed you a bit with the fancy non-linear video editing technology or the endless lists of features, you'll love Avidemux. There seem to be no creative element involved. You won't find multiple video tracks or file library. In a nutshell, you can only cut, copy, paste and encode. May it not turn you away from Avidemux though.

If you have little to no interest in all those post-production bells and whistles, and only need to quickly cut out a piece of footage, go for it. Download Avidemux and you'll never regret. Not only does it take less than 3 seconds to install this software, it also provides the fastest and probably the clearest way to cut a video file into fragments. Once you've set the markers for the required time frame, simply go to the "Edit" tab in the upper menu and choose what you want to do - cut, copy, or delete the piece.

Avidemux video editor interface

Once you're done, you can go ahead and choose video and audio output parameters. For such a basic and free tool, Avidemux has a noteworthy set of codecs to choose from. This is why calling it not just a video editor, but also an encoder is more correct. It supports most popular formats including MP4, MPG, WMV, AVI, DVD, and MOV - as well as the latest H.265/HEVC codec for high-quality videos.

Truth be told, there are few filters available at the configuration level - such as interlacing, noise or sharpness - but they seem to be more technically-inclined rather than serve creative purposes.

What else is good: options to add subtitles and a logo on top of video with alpha blending. These features are also available in the video output menu.

Where to get it: Avidemux version of video editor for Windows 10 can be found on Fosshub, but you can also go through the official product page.

Davinci Resolve - professional software for the experienced ones

Most professional video editors (think Adobe Premiere or Sony Vegas) tend to be pricey for an average user who might only utilize them few times a year. However, if when saying "professional" you think of advanced color correction tools, Resolve is a spectacular video editor for your Windows 10 PC available at zero cost.

Davinci Resolve color grading before and after

You may want to check online courses devoted to Davinci Resolve available on Lynda or Udemy because mastering this beast will require a bit of a steep learning curve if you haven't worked with anything like this before. However, Hollywood-level color grading capabilities should be worth it. On top of that, of course, you get to perform basic operations, such as cutting, splitting and sound adjusting.

There are only two downsides worth mentioning and taking into consideration. First, Davinci Resolve will use your PC GPU to the fullest, so make sure to have a powerful graphic card and a good amount of memory available. Second, there are occasional issues with recognizing certain formats of video and audio. The officially recommended format to work with is ProRes, but it also seems to work smoothly with the majority of files in H.264 codec.

Where to get it: on the official product page. Scroll all the way down to find the free version of the software download link.

Videopad - a Windows 10 video editor for personal use

Videopad is another multifunctional piece of software for video editing, screen recording, audio and video recording. Its free version is called demo and restricted to personal use only. The interface will sure remind you of Movie Maker - especially the file library and the upper menu where video effects and transitions can be found.

Videopad interface overview

Videopad is more a robust tool though. There are multiple video and audio tracks available, so you can work with the non-linear sequence. If you're working with text objects, this editor provides a good number of effects. First, there is a way to add subtitles in real-time. In other words, you can manually input the subtitle text with the precision of a second being able to preview their appearance immediately and correct if required. Second, there is over a dozen of text effects and animations to choose from.

However, the most prominent advanced feature available in Videopad is masking. Right-mouse click on the chosen video fragment and proceed to Effects. A separate window will open, where you'll be able to set the masking parameters.

What else is good: a quick access button to create snapshots in multiple resolutions including 4K Ultra HD.

Where to get it: on the official website of the developer company, NHC Software. Scroll down past the red download button to the "Get it free" section.

Hitfilm Express - a video editor for Windows 10 focused on effects

We're finishing this roundup of Windows 10 video editors with yet another powerful solution popular among YouTube bloggers fond of adding special effects to their videos. Hitfilm Express is a cross-platform software and works on Windows as well as on Mac. Its unique feature set is well hidden behind an unconventional interface though. On the basic level, you'll be able to cut and split media files, add text and work with audio.

Hitfilm Express rotating a video

Once you get the feeling of how the editing process is organized in Hitfilm Express, you'll able to play with the effects. From chroma keying to 3D compositing and many more special effects you've probably seen on TV. Once finished, video projects can be exported in 1080p resolution only, but there are several pre-configured output profiles for further upload to social media.

What else is good: Hollywood movies inspired tutorials on how to apply effects in Hitfilm Express like a pro.

Where to get it: Go to the "Express" page of Hitfilm website to download the free version. You'll be asked to share the page on social networks and leave your email address to get the link.

Wrapping up

Despite the rumors, the long-anticipated Movie Maker successor released by Microsoft hasn’t met users’ expectations. Moreover, the alternative suggested by the company developer allows you to create a beautiful slideshow from photos at best and doesn’t look like a full-featured video editor. So, we hope this list of programs will be of help to those looking for a decent Windows 10 video editor.

VSDC Free Video Editor 5.7 Released with New Blur filters, Advanced Color Correction and WebM Format

December 6, 2016

VSDC Free Video Editor’s new release focuses on expanding and enhancing a number of visual effects and blur filters as well as adding a new Web-compatible format to make video creating more seamless and accessible.

Fine Tuning for Filters&Effects

Gaussian blur filter

1. In addition to the most demanded Gaussian Blur, this filter range now includes Box Blur to create a kind of square distortion effect in the image, Stack Blur to imitate a moving pile of colors and Motion Blur to apply the dim effect in a specific direction, which will be of great use for extreme sports footing.


2. Due to the new ‘Make opaque’ and ‘Make transparent’ effects working with transparency layers has been made much easier and more apt for professional use.


Clipping effect

3. The clipping effect that could be implemented only with the help of overlaying two objects and adding an inverted mask, is currently a separate effect applied in a couple of clicks. Videogamers streaming their records online or vbloggers that need to show ‘video or image through text’ will be able to accomplish their specific goals much faster and hassle free.


Color correction using Gradient

Shape object processing has been updated with adding new parameters to the Brush tool. The background can be now filled using a gradient or a special image pattern from a user’s library. Those who are tech-savvy enough will benefit from it making their own smooth video transitions, applying advanced multiple color correction and creating a stroke for text and subtitles.

More Steps to Versatility

web-m format

1. To enable maximum compatibility with all video Web services and be more accessible for HTML5 supporters, VSDC Video Editor now supports the WebM format as well.

2. Those who have a lot of video content shot on outdated interlaced cameras can now apply deinterlacing methods to make quality more suitable for viewing on modern TV sets, PC screens or mobile devices.


Product page: www.videosoftdev.com/free-video-editor

Yeni Başlayanlar İçin Video Maskeleme Yazılımı

In Legend twin brothers both played by Tom Hardy are created with masking feature

Peki ya bu metni okumayı bitirdiğinizde Hollywood ile özdeşleşen bir post prodüksiyon sırrını tüm detaylarıyla öğreneceğinizi söylesek? Hangisi mi? Sıkı durun! Evet, bu bir video maskeleme yazılımıdır.

Sadece bu teknikle aynı kişinin aynı karede birden çok kez görünmesini sağlamak gibi akıllara en durgunluk veren efektlerden bazılarını yeniden üretebileceksiniz. “Friends”i izleyenler Lisa Kudrow’un canlandırdığı ikiz kardeşleri (Phoebe ve Ursula Buffay) hemen hatırlayacaktır. Daha günümüzden bir örnek vermemiz gerekirse bu efektin mükemmel bir örneği, Tom Hardy’nin neredeyse sürekli olarak aynı karede ikiz kardeşleri canlandırdığı “Legend” filmidir.

Ve sadece bu da değil. Video maskeleme eşsizdir ancak sürekli olarak daha önemsiz işler için kullanılır - örneğin yüzleri ve nesneleri bulanıklaştırma, onları sahneden tamamen kaldırma, yansımalar ekleme, videonun belirli bir bölümünü renklendirme, “metnin içinde video oynatma” efekti oluşturma ve hatta “hayalet görünümü oluşturma” gibi – işte o zaman bir kişi yarı şeffaf hale dönüşür ve arkasındaki nesneleri görebilirsiniz. Çok kötü değil mi?

Bu makalede video maskeleme kavramından ve yeni başlayanların kolayca yeniden oluşturabilecekleri en popüler kullanım örneklerinden bahsedeceğiz.

Video maskelemeyi gerçekleştirmek için bütçe dostu bir program mı arıyorsunuz? Size Windows için VSDC ve Mac için iMovie’ye göz atmanızı öneririz.

VSDC’yi buradan ücretsiz indirin.

Özel bir video maskeleme yazılımına ihtiyacım var mı?

Bu terimi halihazırda birkaç kez kullanmış olsak da “video maskeleme yazılımı” diye bir şey aslında yoktur. Maskeleme, çoğu doğrusal olmayan video düzenleyicinin sahip olduğu bir özelliktir.

Bu makalede yer alan ekran görüntüleri ve video eğitimi için VSDC kullanıyoruz. VSDC Windows için video düzenleme yazılımıdır ve buradan indirebilirsiniz. Program ücretsizdir, ancak maskeleme, yılda 19,99 Amerikan doları karşılığında sunulan Pro sürümünün bir parçası olarak kabul edilir. Eğer Mac kullanıcısıysanız, maskeleme özelliklerine sahip en bütçe dostu video düzenleyici iMovie olacaktır. iMovie’yi buradan indirebilirsiniz.

Gelecekte profesyonel çözümlerle düzenleme yapmayı planlıyorsanız o zaman size araç olarak Adobe Premiere Pro (yılda 239,88 Amerikan doları) ve Pinnacle (59,95 Amerikan dolarından başlayan fiyatlarla) gibi post prodüksiyon programlarını önerebiliriz.


Peki video maskeleme nedir?

Teknik olarak maskeleme özelliği, bir videoda gizlemek, ortaya çıkarmak veya değiştirmek istediğiniz bir alanın ana hatlarını çizmenize yardımcı olur. Maske geometrik veya rastgele bir şekil olabilir. Eğer daha önce Photoshop veya alternatifleriyle çalıştıysanız terminoloji size kesinlikle tanıdık gelecektir.

Pratik olarak konuşursak video maskeleme yazılımı, bir videodaki belirli bir alanı manuel olarak seçmenize ve onunla bağımsız bir nesneymiş gibi çalışmanıza olanak tanır. İşte birkaç örnek.

  • Ana hattı çizilen parçayı kopyalayabilir, bir sahnede çoğaltabilir ve bir klon efekti veya duruk çerçeveli klon efekti oluşturabilirsiniz.
  • Ana hattı çizilen bölüme belirli bir filtre uygulayabilir ve bir videodaki yüzleri veya araba numaralarını bulanıklaştırabilir, hareket halinde olsalar bile onları kapalı tutabilirsiniz.
  • Ana hatlarıyla belirtilen kısmı başka bir görüntü veya videoda katmanlandırabilir ve bir metin maskesi oluşturabilir veya ünlü can sıkıcı turuncu efekti yeniden oluşturabilirsiniz. Portakalın gözleriyle ağzı maskeden başka bir şey değildir. Herhangi bir videodan “kesilmiş” ve portakalın üzerine yerleştirilmiştir. Yine de neden bu kadar sinir bozucu olduğunu açıklamamız çok zor.


Bana mı öyle geldi, yoksa orada farklı maskeler mi var?

Konunun derinliklerine inmeye başlayınca muhtemelen video maskeleme yazılımı hakkında konuşurken kırpma veya ters çevrilmiş maskelerden bahseden video düzenleme meraklılarını fark edeceksiniz. Bu terimler aracı değil, video maskesi uygulama tekniğini tanımlar.

Kırpma maskesi

İnceleyeceğimiz ilk video maskeleme tekniğine kırpma maskesi denir. Kırpma maskesi uygulamak videonun görülebileceği bir görüntü veya şekil eklemek anlamına gelir. Bu görüntü, genellikle şeffaf bir arka plana sahip bir .PNG dosyasıdır. Kırpma maskesi veya kırpma yolu olarak adlandırılır. Efekti uyguladıktan sonra videonun görünen kısmı görüntünün sınırları tarafından “kırpılacak” ve dışarıda kalan kısımlar görünmeyecektir.

İşte ünlü GTA San Andreas video oyunu açılışında kırpma maskesinin nasıl kullanıldığına bir örnek.

Example of the video in text effect

Birkaç tıklamayla VSDC’de bir kırpma maskesinin nasıl yeniden oluşturulacağını öğrenmek için okumaya devam edin.

Ters maske

Kırpma maskesiyle karşılaştırıldığında tersine çevrilmiş bir maske iki videoyu veya görüntüyü ters bir şekilde karıştırır. Zaman çizelgesine bir A görüntüsü yerleştirip ardından üzerine bir B görüntüsü katmanlarsanız ve ters maskeyi uygularsanız, B görüntüsü A görüntüsünün “boş” (siyah) alanlarından görülür.

Ters maske tekniğinin harika bir örneği, genellikle “Metin maskesi” olarak adlandırılan popüler “Metin içinde video” efektidir.


Mutlaka denemeniz gereken inanılmaz video maskeleme yazılımı efektleri

Umarız video maskelemenin size nasıl yardımcı olabileceği hakkında artık bir fikriniz vardır. Şimdi pratik yapmaya ne dersiniz? Yazılımın bazı popüler püf noktalarından kısaca bahsettik. Projelerinizde nasıl kullanılacağını öğrenmek istiyorsanız okumaya devam edin.


Videoda bir yüzü gizleme veya başka bir nesneyi bulanıklaştırma

Bir görüntüdeki bir şeyi bulanıklaştırmak veya pikselleştirmek, tartışmasız en popüler video maskeleme efektidir ve bunu kesinlikle milyonlarca kez görmüşsünüzdür. Genellikle filmlerde, haberlerde, güvenlik kamerası kayıtlarında, isimsiz röportajlarda ve drone ile kaydedilen videolarda GPS koordinatlarını gizlemek için kullanılır.

Teknik olarak izleyicinin gözünden gizlenmesi gereken bir alan seçip bu alana maskeleme uygularsanız, böylece bulanıklaştırma efekti yalnızca seçilen alanda görünür.

Diyelim ki hedefinize ulaşmak için VSDC’de Ters Maske’yi kullanmak istiyorsunuz:

  1. Çekiminizi VSDC’ye aktardıktan sonra Video Efektleri -> Filtreler -> Pikselleştir’e gidin. Tüm video pikselleşecek, ancak kafanız karışmasın bu sürecin bir parçasıdır. Filtre ayarlarını değiştirmek ve maskeyi daha pikselli hale getirmek için sağ taraftaki Özellikler penceresini de kullanabilirsiniz.
  2. Zaman çizelgesindeki efekte çift tıklayın. “Pikselleştir” sekmesi açılacaktır.
  3. Üstteki Nesne ekle seçeneğine tıklayın ve maskeniz için Elips, Dikdörtgen veya Serbest Şekil’i seçin. Nesneyi pikselleştirecek alana yerleştirin.
  4. Sağ taraftaki menüye gidin ve “Maske”yi seçmek için Birleştirme menüsüne tıklayın.
  5. Ardından Maskeyi ters çevir modunu Hayır’dan Evet’e geçirin.

İşte bu şekilde videoyu bulanıklaştırabilirsiniz! Oldukça kolay değil mi?

Aynı şekilde seçilen bir alana başka herhangi bir video filtresi veya efekti uygulayabilirsiniz - ve bunun basit bir bulanıklaştırma olması gerekmez.

Bazen hareketli bir nesneyi takip etmek için bir maskeye ihtiyacınız olabilir. Videoda hareket halinde olan ve yüzü gizlenmesi gereken bir kişiyi örnek olarak verebiliriz. Böyle durumlarda maskeleme ile birlikte hareket yakalamayı kullanmanız gerekir. Bunun nasıl çalıştığını ayrıntılı olarak görmek için aşağıdaki eğitim videosunu izlemenizi öneririz.


Metin maskesi oluşturma

Metin içinde video” veya “Metin Maskesi” göz alıcı ve çok popüler bir efekttir. Genellikle TV şovlarında ve video bloglarında kullanılır. En iyi yanı da onu oluşturmak için kelimenin tam anlamıyla bir dakikadan az zaman harcayacak olmanızdır! Aşağıda size nasıl yapılacağını göstereceğiz, fakat öncelikle “Metin Maskesi”nin büyük boyut ve ekstra kalın harflerden oluşan kısa kelimelerle en etkili şekilde görüneceğini hatırlatmak isteriz.

İşte yapmanız gerekenler:

  1. Harfler aracılığıyla görülmesini istediğiniz bir video ekleyin. Parlak, çok renkli videolar, tek renkli olanlardan daha iyi görünecektir.
  2. Zaman çizelgesindeki videoya çift tıklayın - otomatik olarak bir sonraki sekmeye geçeceksiniz.
  3. Videoya metin ekleyin. Daha iyi görünen bir metin maskesi için metninizi kısa tutmaya çalışın.
  4. Projeniz için gereken boyut ve stili değiştirmek üzere üst kısımdaki metin düzenleme menüsünü kullanın.
  5. Metne siyah renk uygulayın.
  6. Zaman çizelgesinin solundaki menüde “Birleştirme modu” bölümünü bulun. Aşağıdaki ekran görüntüsünde gösterildiği gibi Ters maske seçeneğini seçin.
  7. Uygun şekilde ayarlamak için metni veya videoyu sürükleyin.

How clipping mask was used in a famous GTA San Andreas video game opening


Kırpma maskesi oluşturma

Kırpma maskelerinin ardındaki fikir, “Metin maskesi” efektine benzer, ancak harfler yerine şeffaf arka plana sahip PNG görüntüleri kullanmanız gerekir. Bu görüntüleri, kullanılan videonun yalnızca bir kısmının görülebildiği “pencereler” olarak düşünebilirsiniz.

Kırpma maskesi efekti çok sanatsal görünür. Böyle bir maskenin en muhteşem örneklerinden biri, Louisiana silüetinin Matthew McConaughey’nin silüeti aracılığıyla gösterildiği True Detective’in girişinde kullanılmıştır.

An incredible example of clipping mask with Matthew McConaughey

Aşağıda bu efekti nasıl kullanacağınıza dair bir eğitim bulunmaktadır. Daha önce de olduğu gibi örnek olarak VSDC’yi kullanıyoruz:

  1. İlk olarak kırpma maskenizi çevreleyen bir görüntü ekleyin. Yukarıda bahsedilen True Detective’in girişindeki arka plan, tek tonlu bej bir arka plandır, ancak projeniz için herhangi bir görsel veya videoyu buna göre seçebilirsiniz.
  2. İkinci adım kırpma maskesi görüntüsünü eklemektir. Görüntünün PNG biçiminde şeffaf bir arka plana sahip olması gerektiğini unutmayın. Aksi takdirde sihir gerçekleşmez.
  3. İkinci adımı tamamladığınızda Video Efektleri -> Saydamlık -> Kırpma’ya gidin.
  4. Zaman çizelgesindeki kırpma efektine çift tıklayın, bir sonraki sekmeye aktarılacaksınız.
  5. Son olarak kırpma maskeniz aracılığıyla görülmesi gereken bir video veya görüntü ekleyin. Gerekirse görünümü ayarlamak için sürükleyin.

Kulağa zor gibi gelse de kırpma maskesini uygulamak düşündüğünüzden daha kolaydır. Bir dakikanızı ayırın ve nasıl yapılacağına ilişkin ayrıntılı bir video eğitimi izleyin.


Videoda kendini klonlama

Hollywood yönetmenleri, bu post prodüksiyon numarasını olay örgüsünü renklendirip hikayeleri daha şaşırtıcı bir hale getirmek için kullanırken siz sadece eğlence için denemek isteyebilirsiniz. Çünkü gerçekten çok eğlenceli!

“Klon efekti” kavramı, muhtemelen düşündüğünüzden daha basittir. Aynı kişinin aynı alanda çekilmiş, ancak farklı noktalarda ayakta/hareket halinde çekilmiş birden fazla video kaydını karıştırmanız yeterlidir. Bu şekilde video maske yazılımı kullanarak zaman çizelgesinde iki parça çekimi birleştirdiğinizde videoda aynı anda klonlar varmış gibi görünecektir. Bu birleştirme modunu ilk kez deniyorsanız, ideal olarak tek renkli, düz bir arka plan önünde çekim yapmanızı öneririz. Bunu yaparsanız video daha doğal görünecektir. Ek olarak arka plan, düz ve tek renkli ise düzenleme işlemi sırasında zamandan ve emekten tasarruf edersiniz.

Videoları çektikten sonra hepsini zaman çizelgesine eklemeniz ve Ters maskeyi “klonlar”ın bulunduğu alanlara uygulamanız gerekir. Her şeyin nasıl çalıştığını görmek için aşağıdaki video eğitimini izleyin.


Bir nesne yansıması oluşturma

Son olarak ayrıntılara çok dikkat eden biriyseniz, orijinal videoda olmayan bir nesne üzerinde gölgeler ve yansımalar oluşturmak için bir maske kullanabilirsiniz. Oldukça basittir. Bir nesneyi aynı sahnede çoğaltın, renk derecelendirmesi uygulayın, çevirin ve doğru perspektifi ayarlayın.


Video maskeleme vazgeçilmez bir düzenleme aracıdır

Konsepti anlayıp tekniğe hakim olduktan sonra hayal gücünüzle baş başasınız, çünkü post prodüksiyon olanakları sonsuzdur. İşte size ilham kaynağı olacağını düşündüğümüz birkaç örnek: Aynı anda birden fazla videonun oynatıldığını göstermek için ekranı yaratıcı bir şekilde bölmeyi ve eğer oyun videoları düzenliyorsanız yuvarlak bir yüz kamerası oluşturmayı veya yukarıda bahsedilen Ters maske tekniğiyle video arka planınızı bulanıklaştırmayı deneyin.

Maskeleme gerçekten de bir video düzenleme meraklısının kullanabileceği en güçlü araçlardan biridir. Yalnızca videonun belirli alanlarına renk düzeltmesi uygulamakla kalmayıp aynı zamanda bulanıklaştırma, yansıma ekleme, kırpma maskesi veya metin maskesi gibi harika bir giriş oluşturma için özel efektler söz konusu olduğunda da yeri doldurulamaz. Artık sırrı bildiğinize göre bundan faydalanabileceğinizi ve kliplerinizi daha göz alıcı bir hale getireceğinizi umuyoruz.

Haftalık video eğitimleri için YouTube kanalımıza abone olmayı ve sonuçlarınızı Facebook sayfamızda paylaşmayı unutmayın!

Mutlu düzenlemeler!

VSDC Free Video Editor 5.7.5 Easy Export to Social Networks and Vaster Blending Modes Range

February 21, 2017

Now VSDC allows for uploading files directly to YouTube as well as has special export profiles for Facebook, Twitter and Vimeo.

While uploading their videos to social networks, users often face difficulties in choosing the correct format and other needed parameters as each website can have various requirements for publishing video content. To make working with Facebook, YouTube and other popular social media much easier, new export profiles have been added to VSDC Free Video Editor.

Instagram effects

Export to YouTube

Proceeding to the Web section of the ‘Export project’ tab and clicking the YouTube icon, fans of this video sharing giant will be able to:

  • choose among Low, Standard and High quality profiles;
  • upload a video to YouTube directly without switching windows, logging in their account right in the program

Preparing video for Facebook

According to our technical support data, the most common problem when exporting a file occurs with finding suitable settings to meet Facebook guidelines. As a result of special testing, one recommended profile has been allocated to this social network.

Any more social network profiles?

Clicking the Social Net button of the Web section, users are also invited to benefit from two profiles for Twitter and 4 profiles for the Vimeo video sharing service.

More opportunities for image compositing operations

With new blending modes added, those, who are more tech-savvy and professional in image and video editing, will be able to carry out more compositing operations, i.e. mixing and overlaying colors and textures of different elements and styles.

  • Grain-merge and grain-extract – one of the most popular compositing modes useful for cartographic design

    Instagram effects

  • Dodge and burn - modify the lightness of the pictures. Dodging makes an image lighter, while burning darkens it (can be compared to burning a negative)

    Instagram effects

    Instagram effects

  • Divide – can be used to brighten images or remove color tints.

    Instagram effects


Product page: www.videosoftdev.com/free-video-editor

News

VSDC 9.2: AI segmentasyon modelleri, 300'den fazla geçiş, VSDC Cloud ve yeni şablon koleksiyonu

VSDC 9.2 burada ve hassas nesne kaldırma, gelişmiş renk düzeltme ve videolarınızı geliştirmek için çeşitli efektler sağlayan yeni AI destekli segmentasyon aracı gibi çığır açan özellikler...

Siyah Beyaz Filmler Nasıl Renklendirildi?

Klasik siyah beyaz filmlerin hayranı mısınız? Renkli olsalardı nasıl görüneceklerini hiç merak ettiniz mi? Birçok film yapımcısı da aynı şeyi düşünmüş ve çok sayıda klasik filmin...

En İyi Çevrimiçi Video Düzenleyiciler 2024: Avantajlar ve Dezavantajlar

15 Temmuz 2024 Amy Shao tarafından yayınlandı Şu anda video içeriğinin popülaritesi artıyor ve birçok kullanıcı kişisel ve profesyonel amaçlar için video klipler oluşturma ihtiyacıyla...

New Transition Addition Methods, RAW/BRAW Files Support and Free Waveform

Moment gelmiştir: VSDC 9.1'ün merakla beklenen güncellemesini sunmaktan mutluluk duyuyoruz! Yeni sürümün geliştirilmiş işlevselliği, video montajını hızlandıracak ve düzenleme sürecini...

VSDC 8.3 - 100+ Yeni Şablon, Anahtar Düzenleyici Penceresi, AV1 ve Geliştirilmiş GUI

VSDC 8.3 güncellemesini size sunmaktan mutluluk duyarız! Ekibimiz yeni sürüm üzerinde aktif bir şekilde çalıştı ve şimdi VSDC'de çalışmayı daha kolay hale getirecek tüm değişiklikleri...

2024'te ücretsiz video düzenleme: Bankayı Bozulmadan Yaratıcılığınızın Kilidini Açın

7 Mayıs 2024 tarihinde Tom Shinat tarafından yayınlandı Günümüzün dijital dünyasında yaratıcılık en üst düzeyde hüküm sürüyor. Bireylerin ve markaların izleyicileri büyülemesi ve...

6 iMovie Alternatives for Windows You Should Try in 2024

15 Haziran 2024 tarihinde Amy Shao tarafından yayınlandı Mac'e yönelik tüm video düzenleme araçları arasında iMovie bizim favorimizdir ve onu bu blogda birçok kez tavsiye ettik. iMovie çoğu...

6 En İyi Ücretsiz 3D Animasyon Yazılımı

3D animasyonla çalışmak, çağdaş sanatta en zorlu becerilerden biridir ve yalnızca 3D modeller hakkında bilgi sahibi olmayı değil, aynı zamanda çekim kompozisyonu, oyun motorları, render cihazları...

VSDC 8.2 – Proxy File Support, Color Keyframes and Vectorscope

Merakla beklenen VSDC video editörü 8.2 güncellemesini açıklamaktan heyecan duyuyoruz. Ekibimiz, bu sürümün düzenleme deneyiminizi yükseltecek heyecan verici özellikler ve geliştirmelerle dolu...

VSDC 8.1 Sürümü Çoklu Kamera, Eğri Çizgi Nesnesi, Kayan Metin Efekti ve Daha Fazlasını İçerir

VSDC 8.1'i sunmaktan mutluluk duyuyoruz. Yeni sürüm, hem profesyonel kameramanları hem de grafik tasarımcıları ve profesyonel olmayan kullanıcıları hedefleyen çok çeşitli güncellemeler içeriyor....
 

Screen Recorder Box

Bu program ile masaüstünüzün video videosunu çekebilir ve bilgisayarınıza çeşitli biçimlerde kaydedebilirsiniz. Bir video düzenleyiciyle eşleştirilmiş program, sunumlar ve demolar oluşturmak için idealdir.

Ekran Kaydedici hakkında daha bilgi edinin...


Video Capture Box

Program, dış aygıtlardan video yakalar ve ücretsiz bir biçimde bilgisayara kaydeder. Video tarayıcılardan, web kameralardan, yakalama kartlarından ve diğer araçlardan da video kaydedebilirsiniz.

Video Yakalama hakkında daha fazla bilgi edinin…


İnceleyen


"VSDC Ücretsiz Video Düzenleyici her ne kadar alışılmadık bir video düzenleyici olsa da şaşırtıcı derecede güçlü"

- PC Advisor


"Bu video düzenleyici size tonlarca kontrol ve düzenleme gücü veriyor"

- CNet


"Bu video düzenleyici tüm popüler video formatlarını destekler ve çok çeşitli özelliklere sahiptir. Aydınlatma seviyesini değiştirebilir, videoları birleştirebilir, filtreler ve geçişler uygulayabilirsiniz"

- Digital Trends